Updates
- Jul 12, 2022. In iOS 16, there is now a clear way to do that:
NavigationSplitView.
Triple-column navigation with sidebars, so hot right now. And it’s much easier to implement than one might think. The main challenge is finding accurate information.
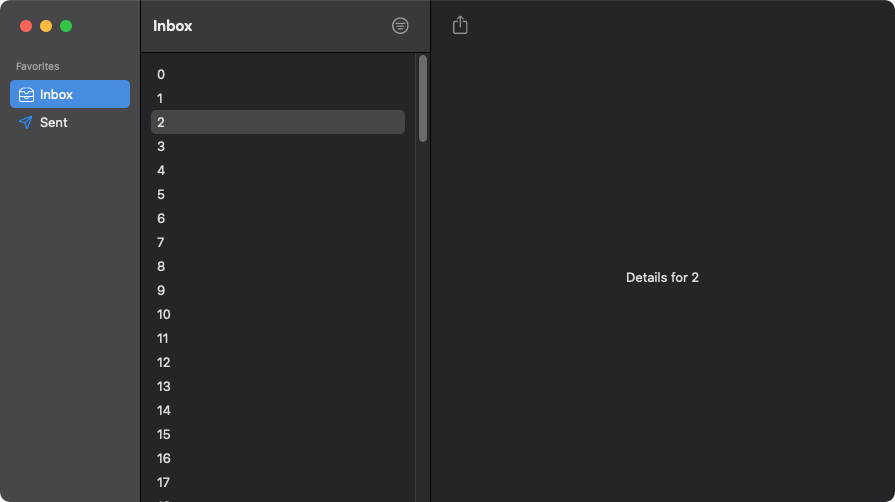
I needed to build triple-column navigation for Pulse and after a lot of struggle got it working exactly the way I want – the way Apple Mail works. I created a minimal project demonstrating how to get it working, and I’ll go over some details in this short post.
You can find the complete implementation on GitHub.
This solution requires Big Sur. And on iPad, you can’t customize it, which you’ll probably want to. This post is focused on macOS.
NavigationView #
For this recipe, you are going to need one NavigationView and nothing else. The key is the type system. What you used to configure in code, e.g. by passing a number of columns to UISplitViewController, you now configure using generic parameters. In my case, the type of the view is NavigationView<TupleView<(Sidebar, Text, Text)>>.
struct ContentView: View {
    var body: some View {
        NavigationView {
            Sidebar()
            Text("No Sidebar Selection") // You won't see this in practice (default selection)
            Text("No Message Selection") // You will see this
        }
    }
}
The second and the third columns are placeholders. Your top navigation doesn’t need to know about the navigation links managed by the sidebar or by any of the content views.
You need to be careful with how you are configuring the
NavigationView. If in doubt, check its type. You can have conditional logic inNavigationViewbased on which navigation links are active, but you can’t dynamically switch between three and two columns1. The type is determined at compile time. TheTupleViewview must have three parameters.
Sidebar #
Creating a sidebar is trivial. The key is NavigationLink. To make one link active by default, pass isActive in the NavigationLink initializer with a default value of true.
Don’t pass
.constant(true)inisActiveor you’ll break the list navigation.
The default selection works on macOS, but not on iOS. It might be because the sidebar is hidden by default. I was primarily focusing on macOS, but people have suggested workarounds.
struct Sidebar: View {
    @State private var isDefaultItemActive = true

    var body: some View {
        List {
            Text("Favorites")
                .font(.caption)
                .foregroundColor(.secondary)
            NavigationLink(destination: IndoxView(), isActive: $isDefaultItemActive) {
                Label("Inbox", systemImage: "tray.2")
            }
            NavigationLink(destination: SentView()) {
                Label("Sent", systemImage: "paperplane")
            }
        }.listStyle(SidebarListStyle())
    }
}
If you want to configure the sidebar dynamically, use
ForEach.
Don’t try to use the List
selectionAPI for navigation. It only exists to support single or multiple item selection of items in edit mode.
ContentView #
Implementing the content view is also trivial. All you need to do is use NavigationLink with destinations.
struct IndoxView: View {
    var body: some View {
        List(allMessages, id: \.self) { message in
            NavigationLink(destination: MessageDetailsView(message: message)) {
                Text(message)
            }
        }
        .navigationTitle("Inbox")
        .toolbar {
            Button(action: { /* Open filters */ }) {
                Image(systemName: "line.horizontal.3.decrease.circle")
            }
        }
    }
}
SwiftUI knows that the NavigationView is configured to a use triple-column layout. It does the right thing when each of the navigation links is invoked. If the sidebar invokes the navigation link, it is displayed in the second column. When the content view invokes one, in third.
Customizing Toolbar #
A toolbar can be configured with multiple different styles on macOS. For example, .windowToolbarStyle(UnifiedWindowToolbarStyle(showsTitle: false)) can be used to remove the title from the second column to allow more space for other toolbar items. With titles already in the sidebar, the second title is often redundant.
Add SidebarCommands to get the default shortcuts to manipulate the sidebar, e.g. Command–Option–S toggle the sidebar.
You can also add a button to toggle the sidebar, but you will have to use a bit of AppKit to implement it. To achieve different placements of the button, use ToolbarItemPlacement.
Conclusion #
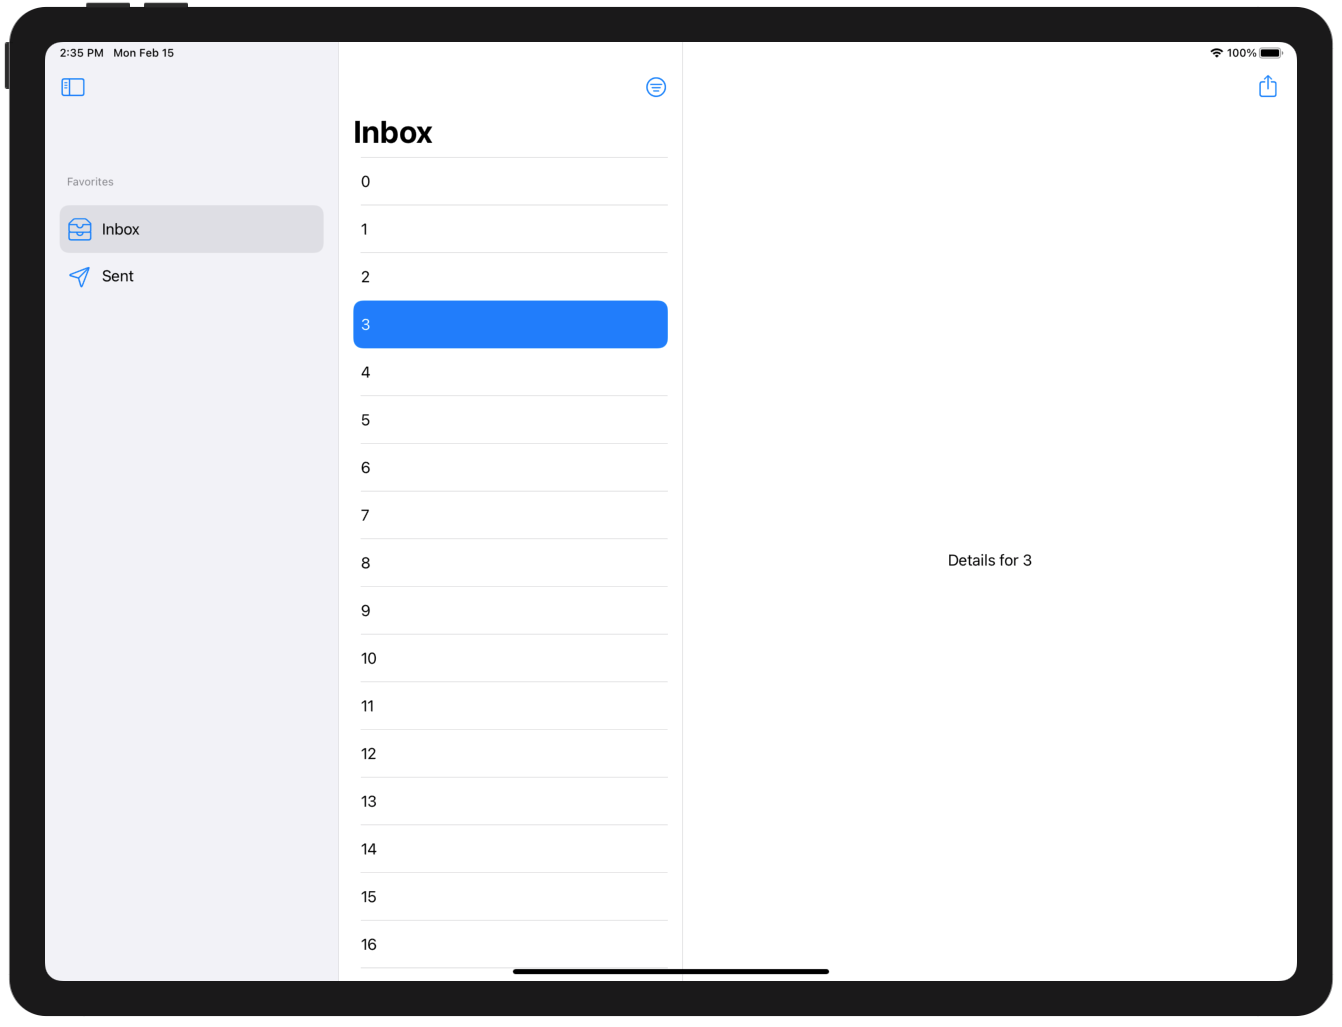
The same code works on both platforms. Please keep in mind that NavigationView it is a bit limited on iPad. This is not a problem on macOS where there is basically only one sidebar configuration anyway. On iPad, the default behavior might not work for your app. And unlike UISplitViewController you can’t configure it.
There is also one caveat when it comes to programmatic navigation. You should be able to change the value of the isActive binding to active a navigation link, but it doesn’t always work. It does if you set it twice using good old DispatchQueue.main.async. Looks like a defect. I’m sure there are other workarounds, but this isn’t even a problem in my case because Pulse doesn’t need programmatic navigation, and the default tab selection works fine as is.
Despite some limitations, this solution works for me it and it uses NavigationView in a way in which it (seems?) it was designed to be used. This shouldn’t be some obscure knowledge that justifies a separate blog post, but here we are.
You can find the complete implementation on GitHub.
References
I wish there were any.
-
Maybe if you dynamically switch between two
NavigationViewinstances you can, I haven’t tried that. ↩