This weekend, I decided to revisit one of my early frameworks - Align. I thought it had some good ideas behind it, but there was still a lot of room for improvement. I ended up re-engineering major parts of it, even taking some inspiration from SwiftUI. I’m thrilled with the results and I can’t wait to show it to you now.
Introduction #
The core idea is still the same: introducing a better, safer, more ergonomic version of Auto Layout anchors. Anchors are great, but they have some unfortunate design decisions:
translatesAutoresizingMaskIntoConstraints- You have to manually activate constraints
- A bulky API
- The API is still too low-level
The first three items are easy to solve. Align does it by introducing a custom Anchor type that works just as you would expect.
Anchoris a generic type. Align uses phantom types to parameterize it with an anchor type and an axis.
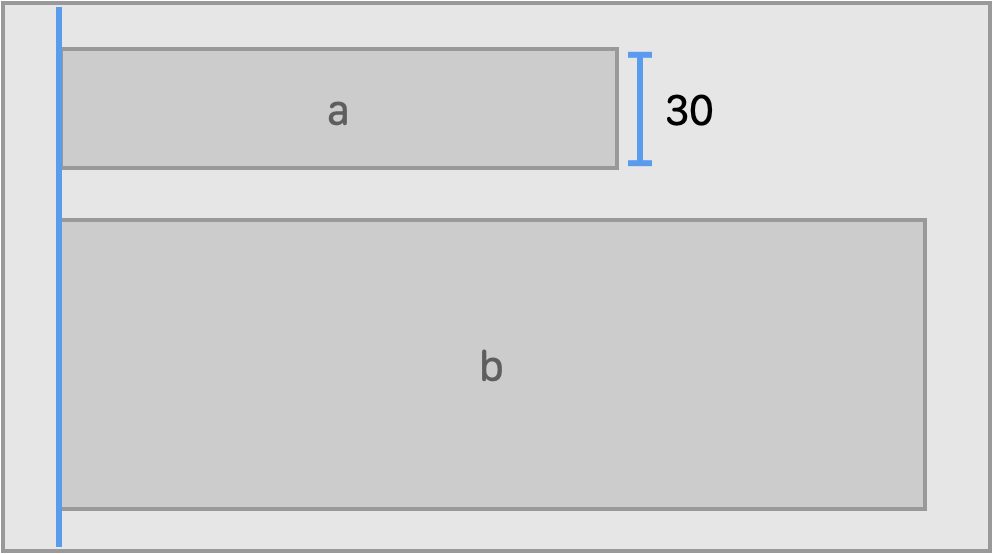
// Align two views along one of the edges
a.anchors.leading.equal(b.anchors.leading)

// Other options are available:
// a.anchors.leading.greaterThanOrEqual(b.anchors.leading)
// a.anchors.leading.greaterThanOrEqual(b.anchors.leading, constant: 10)

// Set height to the given value (CGFloat)
a.anchors.height.equal(30)
Every view that you manipulate using Align has
translatesAutoresizingMaskIntoConstraintsautomatically set tofalseso you no longer have to worry about it.Align also automatically activates all of the created constraints. To activate all of the constraints at the same time, wrap the code that creates the constraints into
Constraints {}closure. Internally, it will keep track of all of the constraints that you create, and when you are done, it will useNSLayoutConstraints.activate()to activate them all at the same time, which is faster than doing it one by one.
The last item – the API is still too low-level – is harder to address. What most frameworks end up doing is augmenting the meaning of the core equal, greaterThanOrEqual, lessThanOrEqual APIs. However, I found that I was almost immediately hitting some roadblocks with this design. For example, if you try to do the following, what does it really do? It is not clear from the API.
view.anchors.edges.greaterThanOrEqual(superview.anchors.edges)

// And this?
view.anchors.edges.lessThanOrEqual(superview.anchors.edges)

// From PureLayout, even without anchors
view.pinEdgesToSuperview(relation: .greaterThanOrEqual)
The other problem with this design is that if you try to generalize it, the implementation complexity grows dramatically. If you look at some of the other open source Auto Layout frameworks that follow this design, it’s hard to read and understand them.
I also quickly realized that this approach would hurt discoverability using Xcode code completion. And one of my primary goals was to make an API so clear that it would be easy to discover all of its features just using code completion. So this was a non-starter to me.
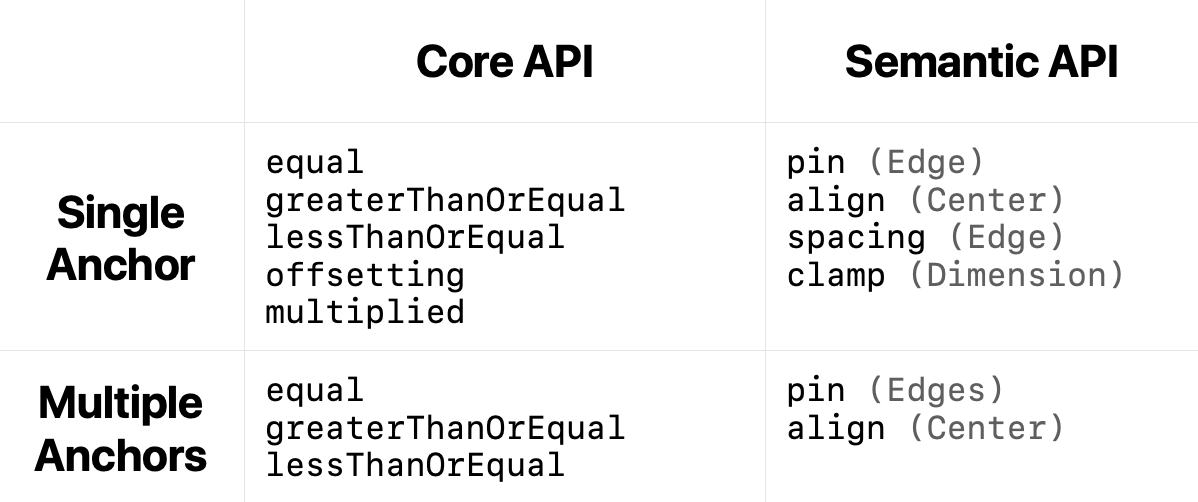
I scraped the idea of augmenting the existing methods and decided to split the API into two parts: Core and Semantic. Align APIs fit in the following quadrant.
The idea is to make Core API as dumb and as close to constraints as possible. Semantic API, on the other hand, is a high-level API that focuses on your goals rather than the constraints. This gives me freedom to choose method names and arguments that fit my needs.
Just to give you a taste of what these semantic APIs look like, here is an example of pin() which is by far my favorite API in Align.
view.anchors.edges.pin(insets: 20, alignment: .center)

Not bad, huh? Barely any code, six constraints created covering one of the common UI use cases. And this is just one example. Alignment parameter in pin() is extremely powerful. It has two components: vertical and horizontal. It covers a lot of possible layouts that you’ll might want to create.
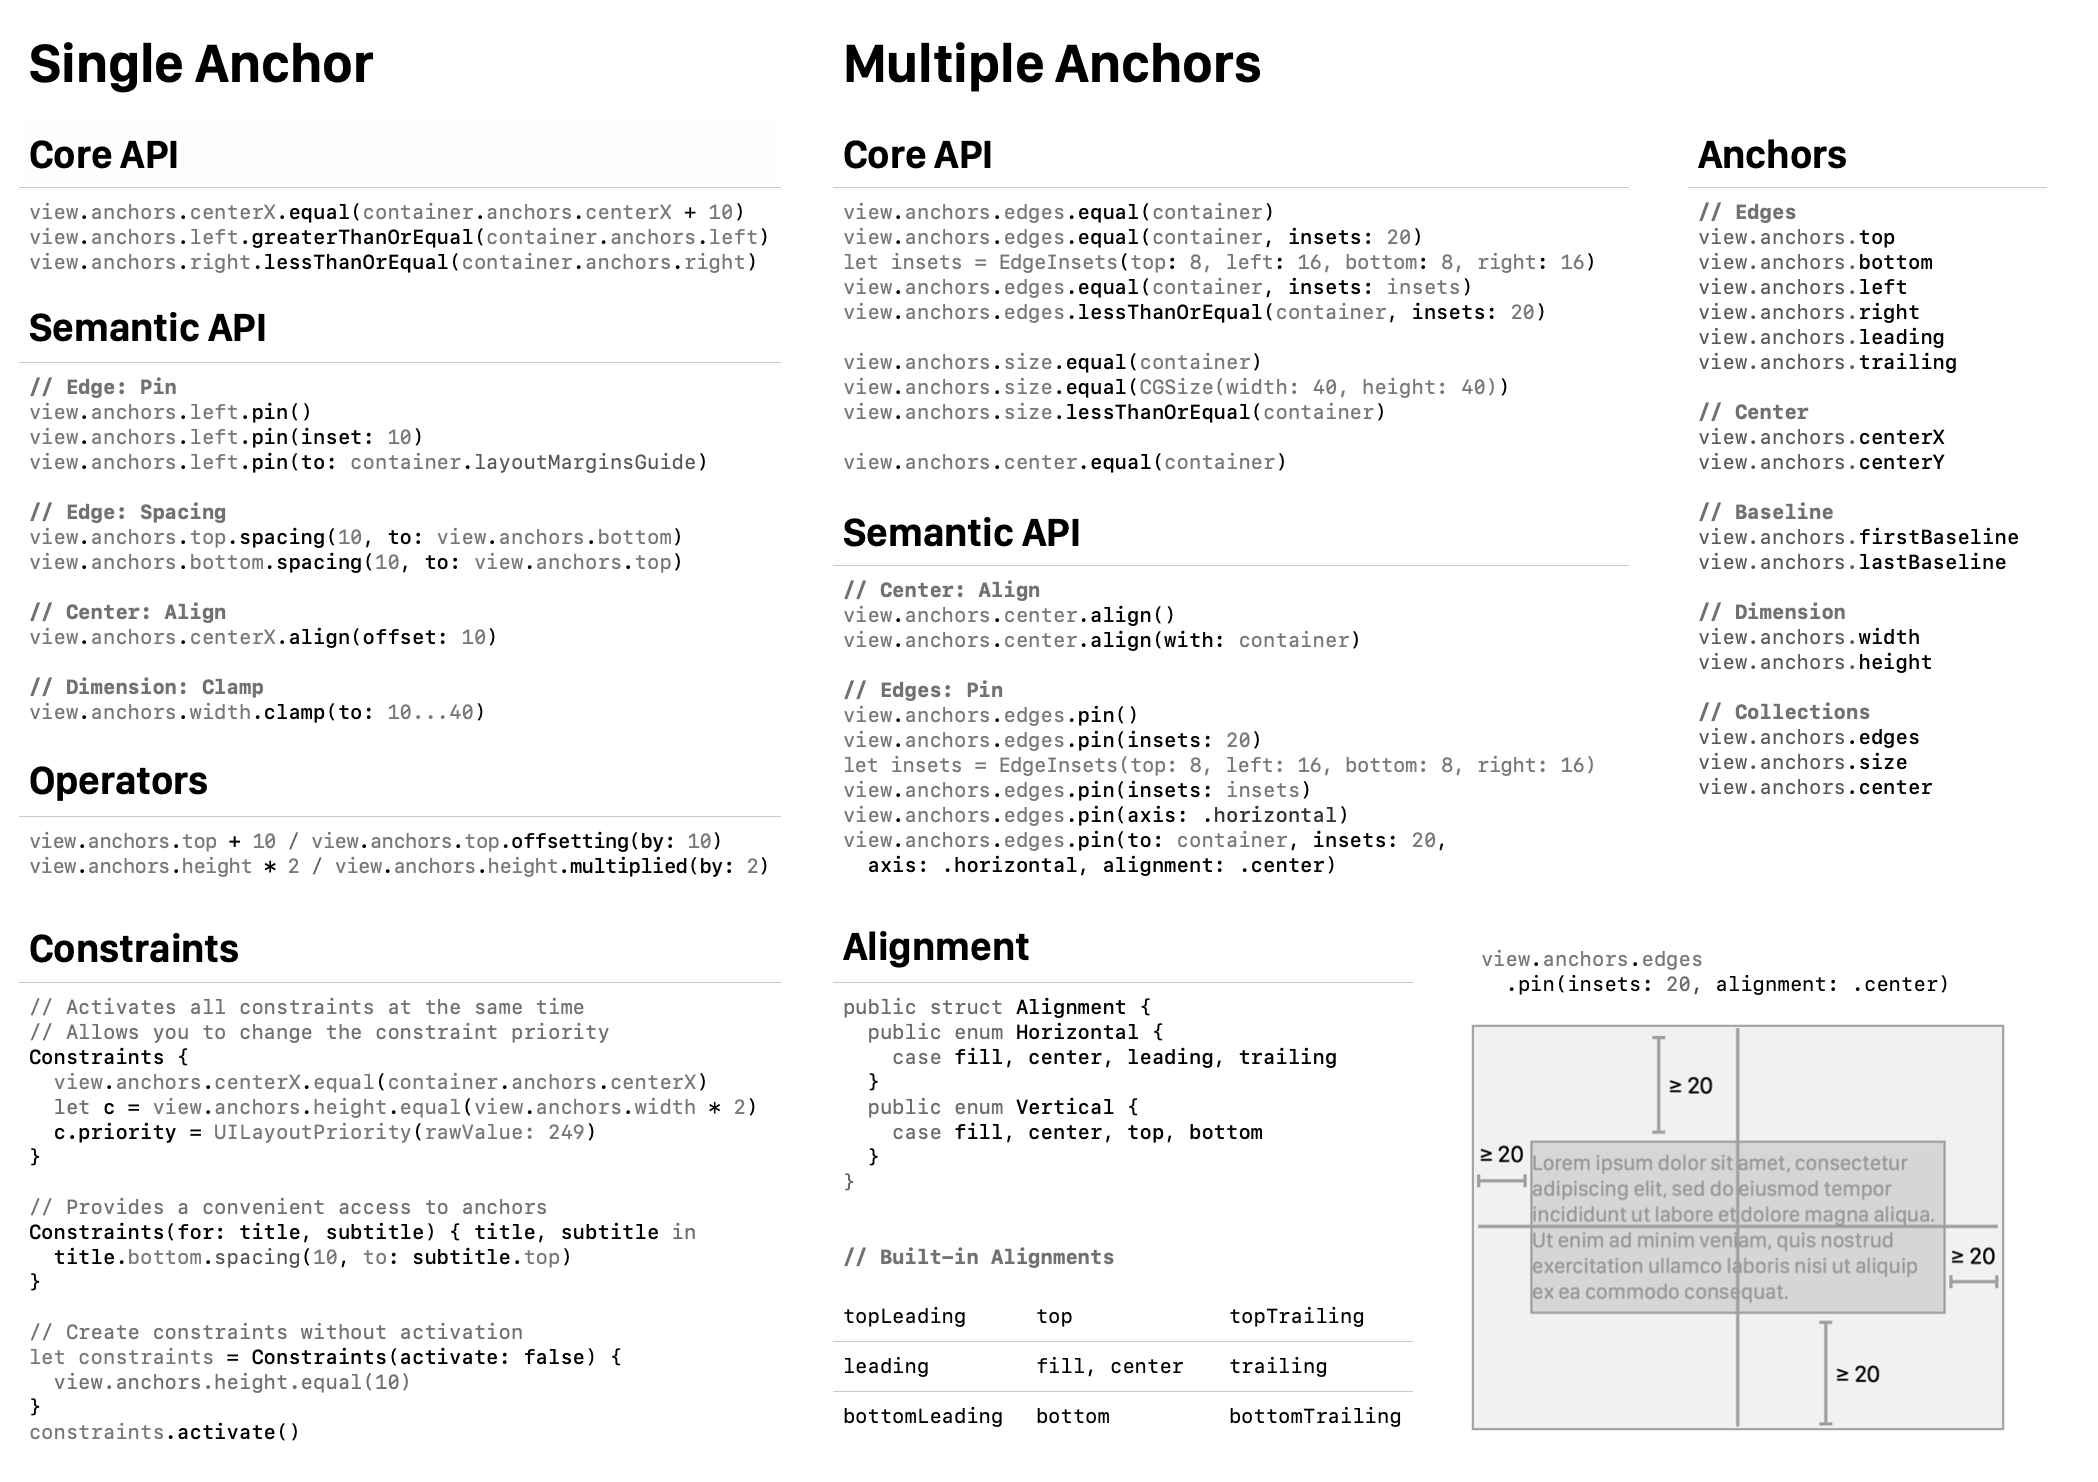
There are multiple ways to learn Align APIs. The APIs surface is small and easily discoverable using Xcode code completion. The README consains an illustrated guide. There is even a cheat sheet available.
Let me give you a brief tour of some other APIs in Align.
Anchors #
Core API #
You’ve already seen some of the Core APIs, but just to reiterate.
// Align two views along one of the edges
a.anchors.leading.equal(b.anchors.leading)

// Other options are available:
// a.anchors.leading.greaterThanOrEqual(b.anchors.leading)
// a.anchors.leading.greaterThanOrEqual(b.anchors.leading, constant: 10)

// Set height to the given value (CGFloat)
a.anchors.height.equal(30)

Note. Every view that you manipulate using Align has
translatesAutoresizingMaskIntoConstraintsset tofalse. Align also automatically activates all of the created constraints.Align has full test coverage. If you’d like to learn about which constraints (
NSLayoutConstraint) Align creates each time you call one of its methods, test cases are a great place to start.
Align also allows you to offset and multiple anchors.
// Offset one of the anchors, creating a "virtual" anchor
b.anchors.leading.equal(a.anchors.trailing + 20)

// Set aspect ratio for a view
b.anchors.height.equal(a.anchors.width * 2)

Semantic API #
// Set spacing between two views
a.anchors.bottom.spacing(20, to: b.anchors.top)

// Pin an edge to the superview
a.anchors.trailing.pin(inset: 20)

Anchor Collections #
With Align, you can manipulate multiple edges at the same time, creating more than one constraint at a time.
Edges #
pin() is probably the most powerful and flexible API in Align.
view.anchors.edges.pin(insets: 20)

// Same as the following:
view.anchors.edges.pin(
    to: view.superview!
    insets: EdgeInsets(top: 20, left: 20, bottom: 20, trailing: 20),
    alignment: .fill
)

By default, pin() method pin the edges to the superview of the current view. However, you can select any target view or layout guide:
// Pin to superview
view.anchors.edges.pin()

// Pin to layout margins guide
view.anchors.edges.pin(to: container.layoutMarginsGuide)

// Pin to safe area
view.anchors.edges.pin(to: container.safeAreaLayoutGuide)
Align also provides a convenient way to access anchors of the layout guide:
view.anchors.safeArea.top.
By default, pin() users .fill alignment. There are variety of other alignments available.
view.anchors.edges.pin(insets: 20, alignment: .center)

You can create constraint along the given axis.
view.anchors.edges.pin(insets: 20, axis: .horizontal, alignment: .center)

Or pin the view to to a corner.
view.anchors.edges.pin(insets: 20, alignment: .topLeading)

You can create custom alignments (see Alignment type) by providing a vertical and horizontal component.
let alignment = Alignment(vertical: .center, horizontal: .leading)
anchors.edges.pin(insets: 20, alignment: alignment)

Center #
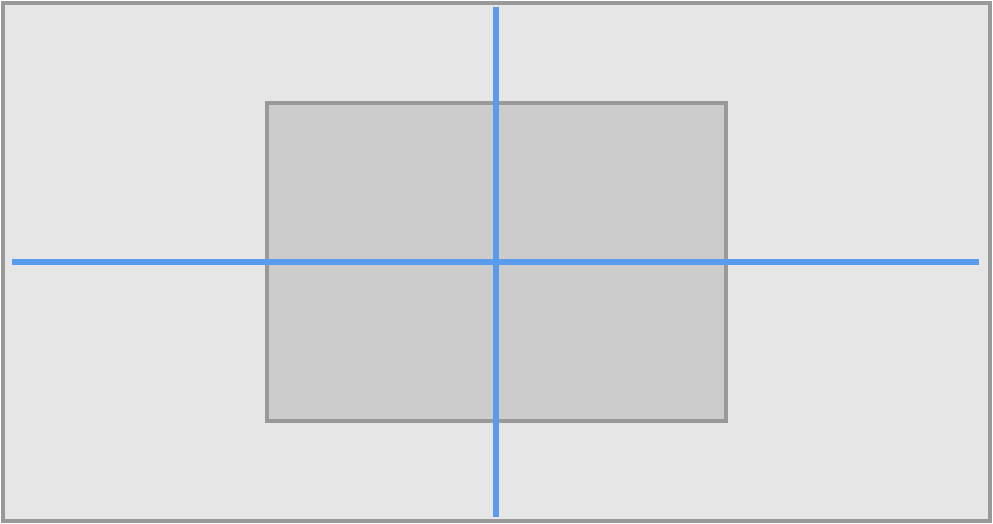
a.anchors.center.align()
Size #
a.anchors.size.equal(CGSize(width: 120, height: 40))
greaterThanEqualandlessThanOrEqualoptions are also available

a.anchors.size.equal(b)

Advanced Stuff #
By default, Align automatically activates created constraints. Using Constraints API, constraints are activated all of the same time when you exit from the closure. It gives you a chance to change priority of the constraints.
Constraints(for: title, subtitle) { title, subtitle in
    // Align one anchor with another
    subtitle.top.spacing(10, to: title.bottom + 10)

    // Manipulate dimensions
    title.width.equal(100)

    // Change a priority of constraints inside a group:
    subtitle.bottom.pin().priority = UILayoutPriority(999)
}
Constraints also give you an easy access to Align anchors (notice, there is no .anchors call in the example). And if you want Align to not activate constraints, there is an option for that:
Constraints(activate: false) {
    // Create your constraints here
}
Final Thoughts #
I hope you are as excited as I am about Align 2. It has a powerful, easy to learn, and easily discoverable API. To give it a try, please visit the Align repository.
