I created my first framework in 2014. It supported one platform, one package manager, and initially had no unit tests. The latest Nuke version, on the other hand, supports all four major Apple platforms, three package managers, and multiple Xcode and Swift versions.
Working on an open-source framework posses a different set of challenges compared to typical app development. Many frameworks are used by thousands of apps that rely on their quality. Yet there is no dedicated QA team. So how is possible to maintain quality?
This is a story of how I went from manually testing my frameworks to having hundreds of unit tests and multiple automatic checks running on every change, and how you can implement a similar setup in your project.
What is CI #
The answer to this question often depends on who you ask. For many people, continuous integration is primarily associated with the tools which enable it. However, the practice comes first.
Continuous Integration is a software development practice where members of a team integrate their work frequently, usually each person integrates at least daily - leading to multiple integrations per day. Each integration is verified by an automated build (including test) to detect integration errors as quickly as possible.
For me as a developer spending a lot of time working on apps in large (20+ people) and often distributed teams, continuous integration is primarily about the people and the practices. It is a way to significantly reduce integration risks. When I think about continuous integration in that context, I think about practices like trunk-based development, feature-flags, avoiding long-running feature branches, concurrent development of consecutive releases, automating code reviews.
However, working on open-source frameworks posses a different set of challenges. There are no deadlines, no project resource utilizations, and, paradoxically, there are not a lot of people working on these projects. Take Alamofire for example, which is the most popular open-source framework in the Apple ecosystem, yet it is essentially written by two people1!
For me as a developer of open-source frameworks, continuous integration is primarily about the tools. I want to be able to quickly test the changes that I make with as many automated tests as possible in as many different environments as possible, including different Xcode versions. In this article, I will primarily focus on the tools, not the practice.
Choosing the Right Tool #
CI tooling is a competitive space. Your choice depends largely on context2.
What are the options for open-source frameworks? I started looking for a CI tool for Nuke somewhere in 2016 after I added support for additional Apple platforms and realized that it was no longer feasible to run the tests manually each time for all platforms.
Unit Testing. This is an entirely different topic. Fortunately, covering frameworks with unit tests is typically much easier than trying to figure out what to test in an iOS app and how to test it. There are plenty of articles written on this topic, whether about XCTest, or Quick, or unit testing in general. To make your framework testable it needs to be engineered for testability.
I knew that I was looking for a tool that was easy to set up and I didn’t need a lot of flexibility or scalability. For me, the choice was Travis CI which I’ve been using ever since and I’ve been extremely happy with it3.
Travis CI #
Travis CI is one of the simplest ways to test projects hosted on GitHub. I’m not going to cover how to set it up, I suggest going through Travis CI Tutorial instead. By the end of the tutorial, you will have a new .travis.yml file in your git repository which should look somewhat like this:
language: swift
os: osx

git:
  depth: 1
Please also make sure that you also enable Travis to build pull requests. I would then suggest creating a pull request to start experimenting with Travis CI4.
At this point a lot of people get lost: jobs, builds, matrices, stages. How do you configure them? Where to start?
Jobs #
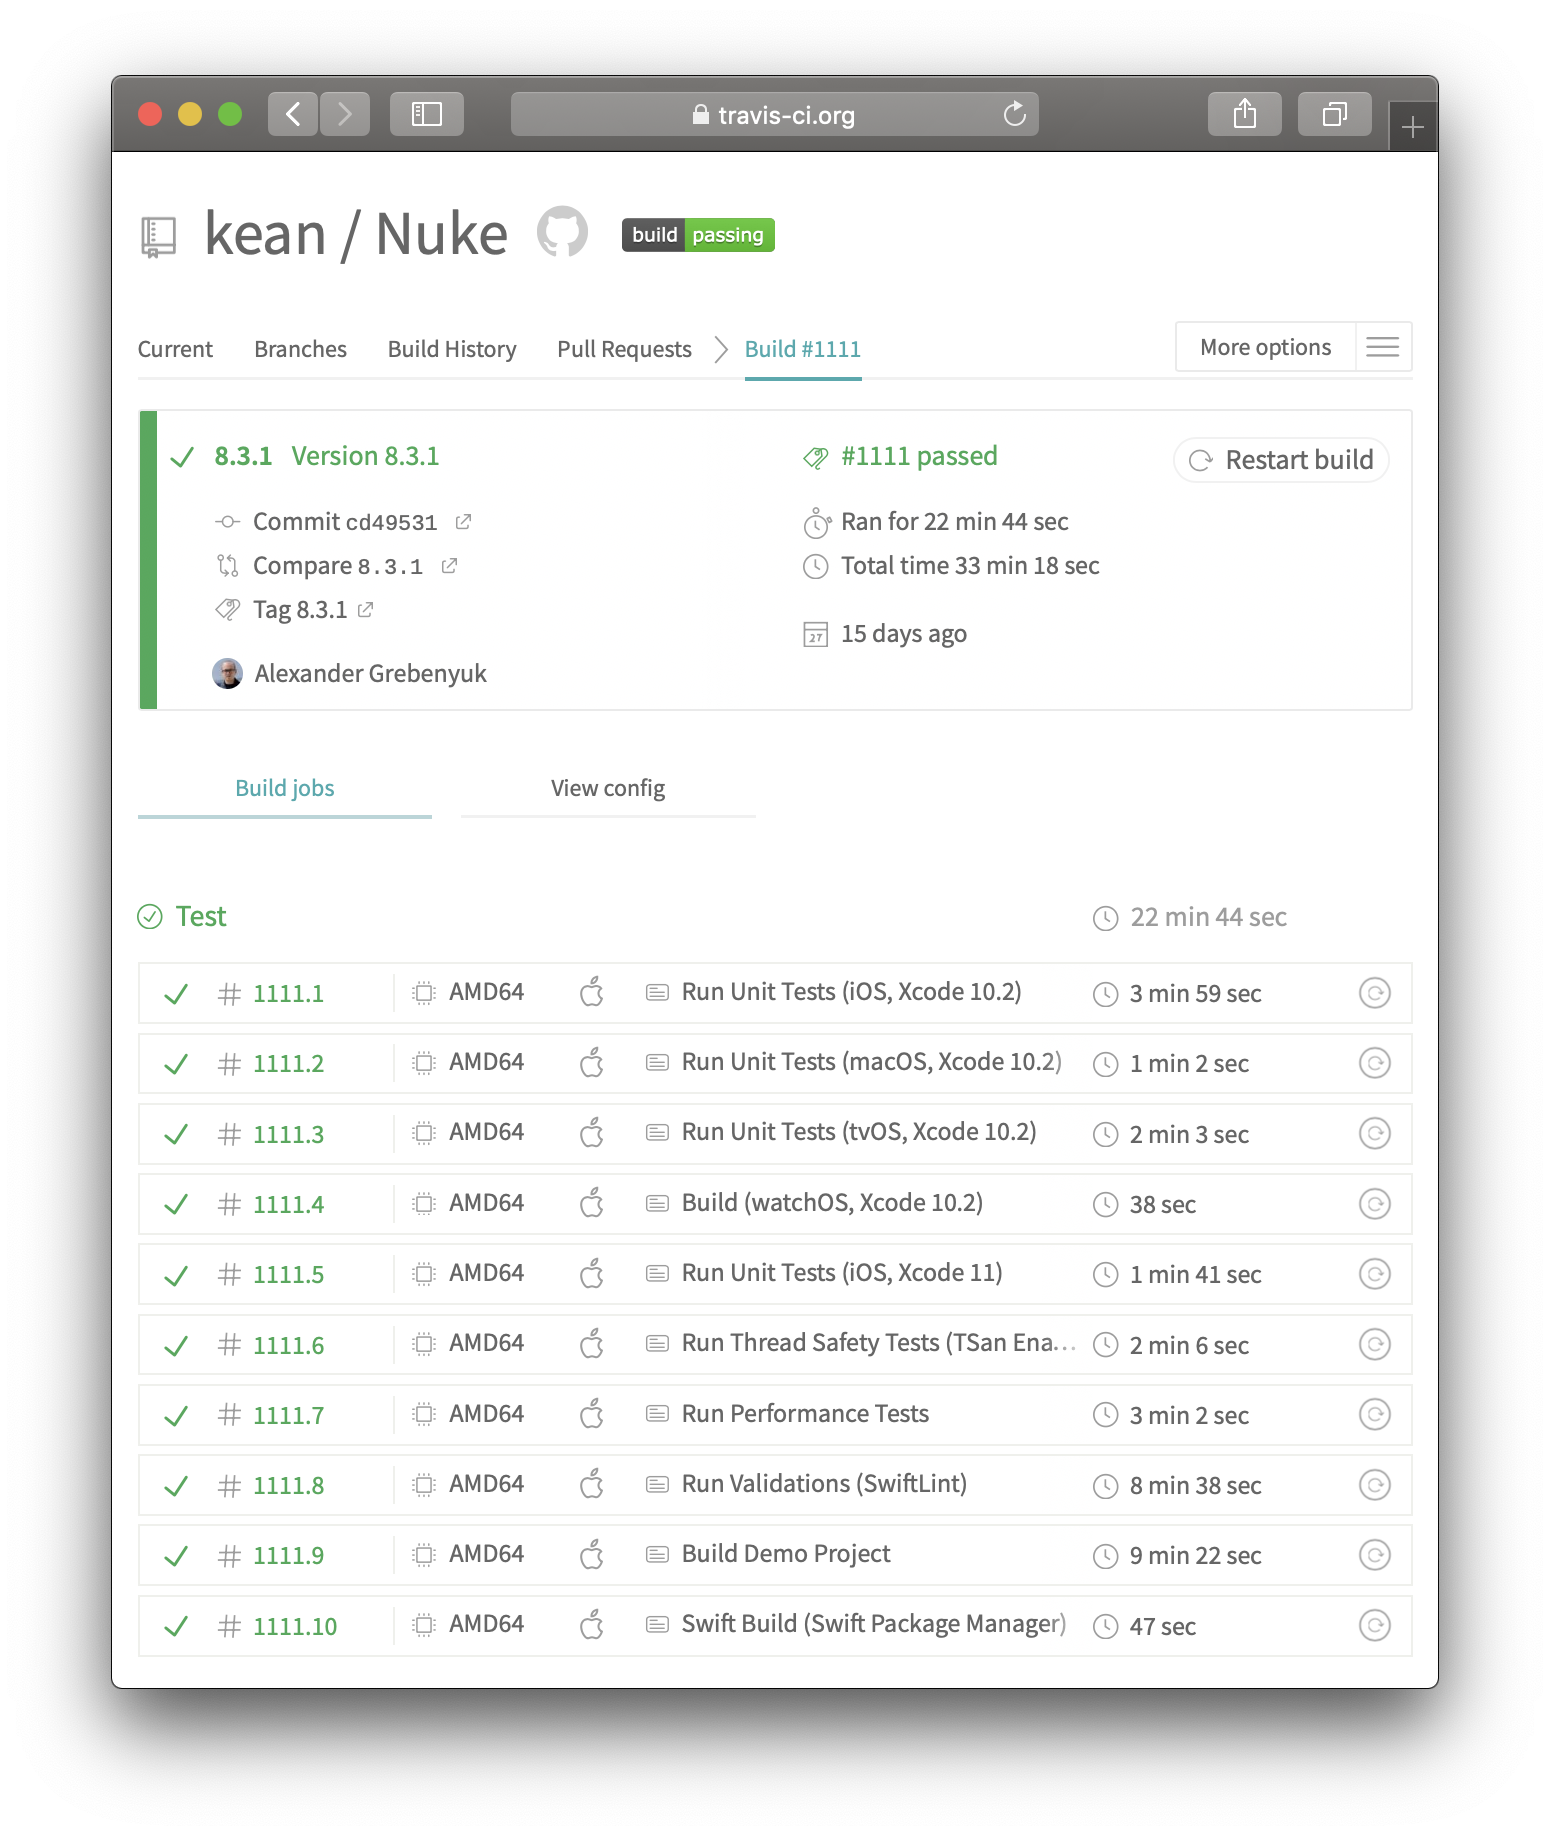
A job is one of the primary concepts of Travis CI. For each job, a virtual machine is created with the build environment, your repository is cloned into it, optional add-ons are installed and then your build phases are run. Here is an example of one of the jobs executed for Nuke.
By default, the CI actually does very little. Its primary job is to detect changes in your repository, clone it, and execute your custom scripts. So let’s start by creating our first script. I’m going to use Nuke’s .travis.yml as an example.
Configuring a Job #
The first job in Nuke is configured the following way:
jobs:
  include:
    - name: Run Unit Tests (iOS, Xcode 10.3)
      osx_image: xcode10.3
      script: Scripts/test.sh -s "Nuke" -d "OS=12.2,name=iPhone X" -d "OS=11.4,name=iPhone X" -d "OS=10.3.1,name=iPhone SE"
This job runs on a virtual machine with Xcode 10.3 installed. It builds the framework – only once – and then runs the tests on three major iOS versions.
Wait, why Xcode 10? Turns out, there are a lot of teams that don’t update to the latest Xcode versions the moment they are released. For a framework, it’s crucial to support a wide range of Xcode versions. Fortunately, at the moment of writing this, Travis CI comes with Xcode versions ranging from Xcode 6.4 to 11.2.
Travis CI allows you to inline scripts in .travis.yml, however, it’s always a good idea to extract those into separate files. The scripts can be a part of your repository and can easily be called from the .travis.yml. Take Scripts/test.sh as an example:
#!/bin/sh

while getopts "s:d:" opt; do
    case $opt in
        s) scheme=${OPTARG};;
        d) destinations+=("$OPTARG");;
    esac
done
shift $((OPTIND -1))

set -o pipefail

xcodebuild build-for-testing -scheme "$scheme" -destination "${destinations[0]}" | xcpretty;

for destination in "${destinations[@]}"; do
    xcodebuild test-without-building -scheme "$scheme" -destination "$destination" | xcpretty;
done
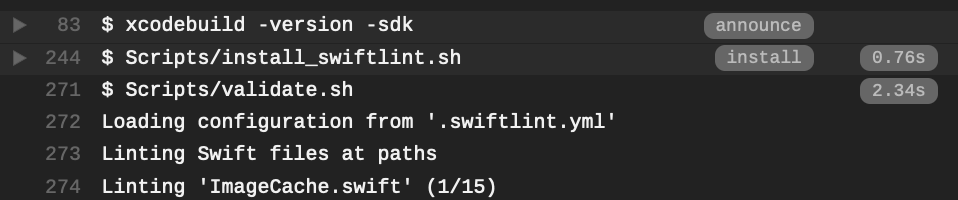
What is does is builds the framework first (xcodebuild build-for-testing) and then runs tests for each of the provided destinations (xcodebuild test-without-building)5. You can find an output of this job on Travis.
xcprettyis a third-party tool that comes pre-installed in Travis CI. It’s a great tool that formatsxcodebuildoutput in a nice structured way.xcprettyis not the only pre-installed tool. It also comes with Bundler, Carthage, SwiftLint, CocoaPods and a bunch of other tools. And of course, you can install your own tools.
Build Matrix #
The moment you create your first job and realize how easy it is to run it, you immediately want more! So what are we going to do? Oh, we are going to use build matrices, right?
No. Build matrices seem like a good idea until they don’t. In theory, you combine a language-and-environment dependent set of configuration options to automatically create a matrix of all possible combinations. This is called matrix expansion. In practice, this is not what you typically want.
Many popular open-source frameworks fall into this trap. They start with matrices and they try to hack install and script phases to make them do what they want. Here is just one example that I found. I made the same mistake when I was just starting using Travis CI.
If you are on an open-source plan, please remember that Travis CI provides this service free of charge to the community. It is also time-consuming. You should be careful about prioritizing what jobs you want to run because you don’t want to wait forever until your build is green. I think for most projects, a much better way to configure multiple jobs is by specifying the exact combination of configurations and scripts that you want.
Jobs Ideas #
Fortunately, you already know everything to start adding more jobs. All you need to do is write more scripts and add them to jobs: include: in your .travis.yml. What jobs should you add? It, of course, depends on your project, but here are just a few ideas of what kind of automatic validations you might want to run on the CI.
SwiftLint #
SwiftLint is a tool to enforce Swift style and conventions. By using it, you spend less time focusing on formatting in code reviews.
SwiftLint comes pre-installed on Travis CI. However, if you would like to use the latest version, you need to install it manually. There are not a lot of suitable installation options. It is available via Homebrew, but brew always installs the latest version, there is no way to pin a version. What I ended up doing is simply downloading a pre-compiled binary.
# Scripts/install_swiftlint.sh

curl -L 'https://github.com/realm/SwiftLint/releases/download/0.36.0/portable_swiftlint.zip' -o swiftlint.zip
mkdir temp
unzip swiftlint.zip -d temp
rm -f swiftlint.zip
# Scripts/lint.sh

./temp/swiftlint lint --strict
A job on Travis CI is made up of two main parts:
install: install any dependencies requiredscript: run the build script
# .travis.yml

jobs:
  include:
    # ...
    - name: Run Validations (SwiftLint)
      osx_image: xcode11
      install: Scripts/install_swiftlint.sh
      script: Scripts/lint.sh
It’s a good idea to put installation code into an install script. It shows in a separate contracted section in the logs. If it fails, it breaks a build in a different way than script does.
Running validations in separate jobs allow you to parallelize the work across multiple virtual machines. And if the job fails, it won’t fail the rest of the build, which I think is important. You don’t want a single SwiftLint warning to stop all the rest of the validations from running, it could slow down the feedback cycle. You want to surface all of the issues with the build in one go.

Environments #
When we configured our first job, we made it run in a single environment with Xcode 10.3 installed. But a framework will be used in different environments, with different Xcode and Swift versions, on different platforms. With Travis CI, it’s very easy to set up as many jobs for as many different environments as necessary.
# .travis.yml

jobs:
  include:
    # ...

    - name: Run Unit Tests (macOS, Xcode 10.2)
      osx_image: xcode10.2
      script: Scripts/test.sh -d "arch=x86_64"

    - name: Run Unit Tests (tvOS, Xcode 10.2)
      osx_image: xcode10.2
      script: Scripts/test.sh -d "OS=12.2,name=Apple TV 4K" -d "OS=11.3,name=Apple TV 4K"

    - name: Build (watchOS, Xcode 10.2)
      osx_image: xcode10.2
      script: Scripts/build.sh -d "OS=4.2,name=Apple Watch - 42mm"

    - name: Run Unit Tests (iOS, Xcode 11)
      osx_image: xcode11
      script: Scripts/test.sh -d "OS=13.0,name=iPhone 11"

    - name: Run Unit Tests (iOS, Xcode 11.2)
      osx_image: xcode11
      script: Scripts/test.sh -d "OS=13.0,name=iPhone 11"
Test Suites #
Nuke has more than one test suit.

So what I do as part of each build is run these two of the additional test suites which I don’t normally run: Thread Safety Tests and Performance Tests.
# .travis.yml

# Notice that I re-use the same exact `test.sh` across different jobs.

jobs:
  include:
    # ...
    - name: Run Thread Safety Tests (TSan Enabled)
      osx_image: xcode11
      script: Scripts/test.sh -s "Nuke Thread Safety Tests" -d "OS=13.0,name=iPhone 11"

    - name: Run Performance Tests
      osx_image: xcode11
      script: Scripts/test.sh -s "Nuke Performance Tests" -d "OS=13.0,name=iPhone 11"
Thread Sanitizer (TSan) is a fantastic tool that detects data races at runtime. Data races occur when multiple threads access the same memory without synchronization and at least one access is a write. These types of defects are hard to detect, and TSan makes life that much easier.
The job that runs performance tests is currently not set up to record any of the results. Its goal is to simply check that the test suites builds and runs. To make performance tests produce consistent results you must have a controlled environment. This is something that I would like to address in the future.
Demo Projects #
If you are maintaining a framework that has a demo project or a playground, you probably know the pain of constantly breaking one of these. With CI, this is no longer a problem. For example, here is a script that validates the demo in Nuke:
# .travis.yml

cd Demo
carthage update --platform ios
xcodebuild -workspace NukeDemo.xcworkspace -scheme NukeDemo -destination  "OS=13.0,name=iPhone 11" | xcpretty
Package Managers #
Users expect their frameworks to support all popular package managers. In the Apple ecosystem, that list includes Swift Package Manager, Carthage, and CocoaPods. Each tool has a unique way of configuring packages. One of the validations that you might want to run on the CI is to check that the packages are configured correctly. For example, here is how to check that Swift Package Manager can successfully build a package.
jobs:
  include:
    # ...
    - name: Swift Build (Swift Package Manager)
      osx_image: xcode11
      script: swift build
This type of validation you probably don’t want to run on each commit. It might be a good idea to run it before each deployment. Speaking about deployments.
Deployment #
Let’s briefly talk about a holy grail of modern software engineering, Continuous Delivery and Deployment. Travis CI provides you with an instrument to do just that with Build Stages.
Build stages is a way to group jobs, and run jobs in each stage in parallel, but run one stage after another sequentially. The simplest and most common use case of stages is to test your framework by running all the validation jobs that you configured in parallel. And then release your package only if all tests have passed and completed successfully.

This is something that I keep in mind but I haven’t yet configured for Nuke. But when you know how to set up jobs, working with stages is a breeze. All you need to do is follow the official tutorial.
A deployment script might involve updating the framework version, pushing the latest podspec to trunk, generating and deploying the documentation using jazzy – everything that you would do during the manual deployment.
Final Thoughts #
I hope that you found this article useful. I described my entire current Travis CI setup for Nuke. You can always go to the Nuke’s repository and see for yourself how it is configured and how it works.
I find it fascinating how far you can get even with the simplest of scripts. In terms of what jobs you might want to run, the only limit is your imagination. I am currently investigating whether there are ways to incorporate some of the Xcode Instruments into my CI pipeline. For example, automatically finding leaks or running generational analysis6 could be a great addition.
The jobs that run instruments don’t necessarily have to make a binary decision whether to fail the build or not. To the very least they could automatically generate a complete report about the build and present nicely. This could be a major quality of life improvement!
Delivering software is easy, maintaining quality and velocity is hard. Continuous integration can be a game-changer in achieving great quality and high iteration speed.
References
- Martin Fowler, Continuous Integration
- Paul Duvall, Steve Matyas, and Andrew Glover, Continuous Integration: Improving Software Quality and Reducing Risk
- Travis CI
- xcpretty
-
Not counting Mattt since he hasn’t been actively involved in the project since 2015. ↩
-
Large companies typically want to run their software on-premise and the obvious choice for them is Jenkins which provides flexibility and scalability. Jenkins is free but not every company can afford running it – you need to invest time and money in maintaining it. For smaller companies, cloud solutions are often the best choice. For example, I had been using BuddyBuild when working for a startup in 2018. BuddyBuild was acquired by Apple in 2018 and they have not been accepting new customers since. The future of BuddyBuild within Apple is still unclear. ↩
-
Travis CI is not the only free cloud CI service. Some project has already started using GitHub Actions which is currently in beta. There is also Circle CI and other tools. ↩
-
In case you want to build pushes to branches, I would suggest filtering which branches to build. In Nuke, I currently build only
masterbranch:branches: only: - master. ↩ -
The
-destinationoption ofxcodebuildmay be specified multiple times to causexcodebuildto perform the specified action on multiple destinations. Unfortunately, I was not able to make it work on Travis CI, it was constantly hanging when starting simulators. ↩ -
The Generations view in the Allocations instrument is useful for investigating memory use for a particular feature of your framework. For example, to test a particular feature, you first click Mark Generation button in the Allocations instrument. Then you activate the feature, in Nuke it could be load and process a few images. Then you repeat a few times. At the end, make sure that after invoking a feature, the size of each marked generation stays relatively the same. For more information, see Apple Documentation. ↩