Creating views in code has a lot of benefits - you get to reuse styles, create abstractions, quickly prototype components in Swift Playgrounds. However, this code can easily become messy and hard to read. It requires a certain amount of discipline to make it nice and readable. If you do, you would definitely thank yourself later when that code needs to be changed.
In this post, I’d like to share some of the practices that I use when writing view code. It is nothing groundbreaking, however, there might be some things worth taking away.
Example #
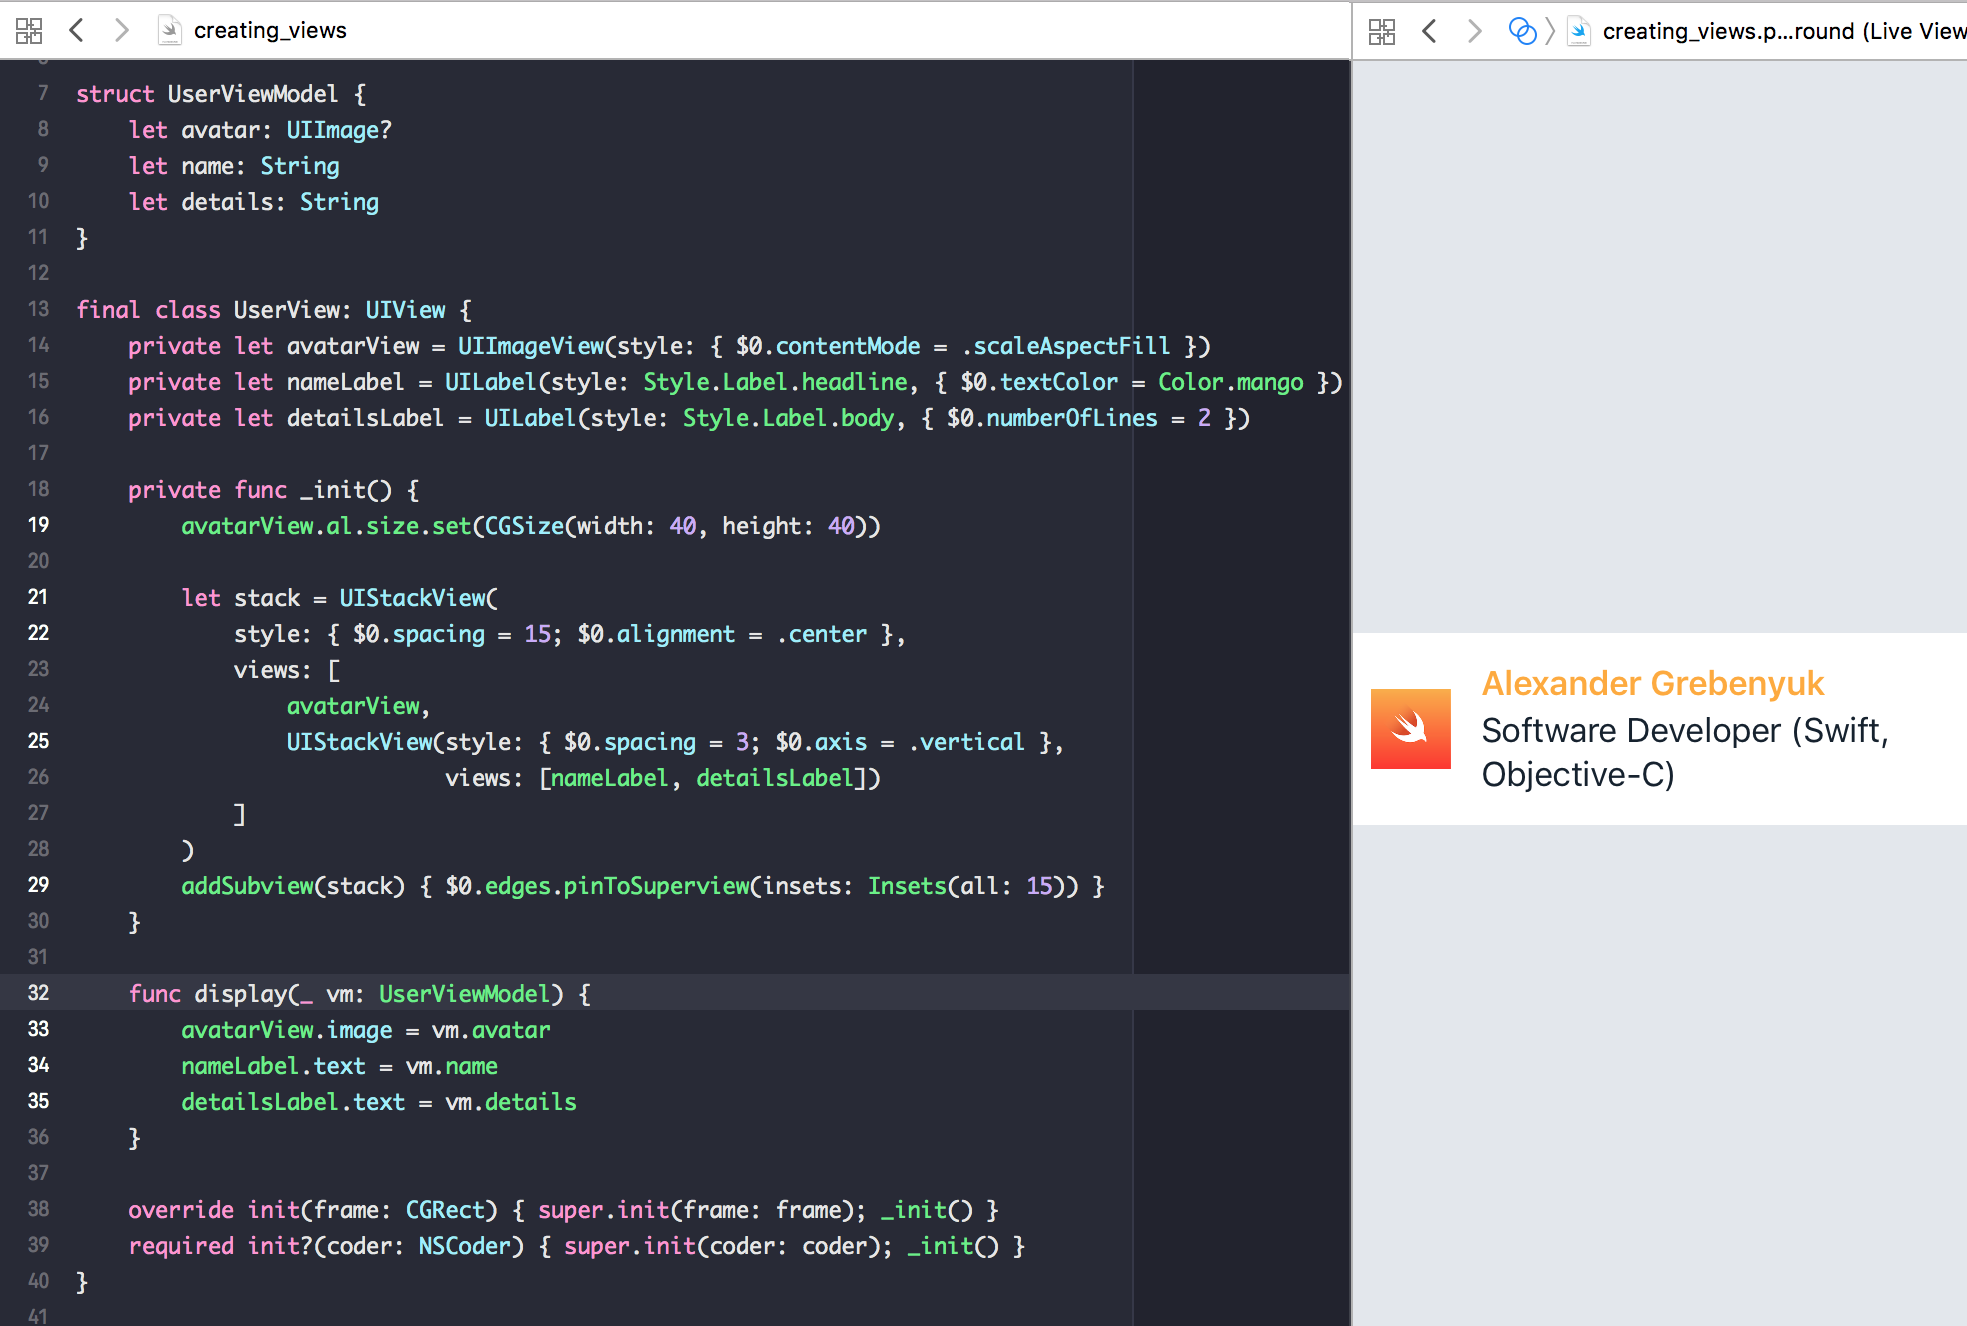
Let’s jump straight into the code. Here’s an example of a view that displays a user (full code available in a playground):
I will go into more details about the two major areas of this code - style and layout. Let’s start with the style.
Style #
Styles are defined using a simple convenience initializer with a variadic argument which accepts one or more functions. The simplest way to define styles is by “inlining” them:
UILabel(style: {
    $0.textColor = UIColor.white
    $0.font = UIFont.preferredFont(forTextStyle: .body)
})

// In a single line and with a trailing closure for compactness:
UILabel { $0.textColor = .white; $0.font = .preferredFont(forTextStyle: .body) }
However, in most cases it makes sense to define shared styles and reuse them across the app:
UILabel(style: Style.Label.body)

// MARK: - Style

public enum Style {
    public enum Label {
        public static func body(_ label: UILabel) {
            label.font = UIFont.preferredFont(forTextStyle: .body)
            label.textColor = Color.darkGray
        }
    }
}

public enum Color {
    public static let darkGray = rgb(22, 34, 48)

    private static func rgb(_ r: CGFloat, _ g: CGFloat, _ b: CGFloat, _ a: CGFloat = 1.0) -> UIColor {
        return UIColor(red: r / 255.0, green: g / 255.0, blue: b / 255.0, alpha: a)
    }
}
The functions that define styles are applied in their original order, which can be used to make styles “cascade” the way they do in CSS:
UILabel(style: Style.Label.body, { $0.textColor = .white })
In order to keep classes short and clean, you can also define several styles in one place:
final class UserView: UIView {
    private let avatarView = UIImageView(style: Style.avatarView)
    private let nameLabel = UILabel(style: Style.Label.head, Style.nameLabel)
}

private extension Style {
    static func avatarView(_ view: UIImageView) {
        view.contentMode = .scaleAspectFill
    }

    static func nameLabel(_ label: UILabel) {
        label.textColor = Color.mango
        label.numberOfLines = 2
    }
}
Layout #
In the example I used stack views and Align to define layouts.
You can learn more about Align in its repository. Here I’m going to focus on UIStackView syntax sugar. It’s just two lines of code, which enable concise and readable syntax. It can be used to easily create a hierarchy of stacks, which is a very common use case:
let stack = UIStackView(
    style: { $0.spacing = 15; $0.alignment = .center },
    views: [
        avatarView,
        UIStackView(style: { $0.spacing = 3; $0.axis = .vertical },
                    views: [nameLabel, detailsLabel])
    ]
)
What makes this work well is that styles are always defined upfront. If the list of arranged views becomes too long, styles still remain visible.
Check out Let’s Build UIStackView to learn how stacks work under the hood.
In the example Align is used very briefly. But you can definitely use an Auto Layout library of your choice instead (or no library at all and just stick with native layout anchors).
avatarView.al.size.set(CGSize(width: 40, height: 40))
addSubview(stack) { $0.edges.pinToSuperview(insets: Insets(all: 15)) }
I also find those helpers extremely useful when working with UIEdgeInsets:
public typealias Insets = UIEdgeInsets

extension UIEdgeInsets {
    public init(all: CGFloat) {
        self = UIEdgeInsets(top: all, left: all, bottom: all, right: all)
    }

    public init(ver: CGFloat = 0, hor: CGFloat = 0) {
        self = UIEdgeInsets(top: ver, left: hor, bottom: ver, right: hor)
    }
}
Conclusion #
As you can see it takes just a bit of extra effort to write view code which is a pleasure to read and modify. I’m not entirely happy how style initializers are implemented at the moment - there is some code duplication - however, they get the job done.
Besides, I also find it extremely effective to prototype views in Swift Playgrounds. This way you have an instant feedback when you change styles or layouts. In order to use the shared styles in Playgrounds, you need to extract them into a separate module if you haven’t done that already.
If you have some best practices not mentioned in the article that you’d like to share, please add them to the comments section below.