When I started working on Pulse, I challenged myself to push SwiftUI to the limit and not rely on any platform-specific code. I had my eyes on the prize that eventually I’ll add support for all Apple platforms, including watchOS and tvOS. Time to reap the benefits.
Take Debugger with You #
After designing and implementing an iOS and macOS app, watchOS was a walk in the park. SwiftUI feels the most at home on this platform. It isn’t surprising since it’s the only way to develop a modern watchOS app. When you use SwiftUI, you know that it gives you the full power of the platform. It feels great!
Updating Pulse to work on watchOS took me just a couple of hours. I was able to reuse the existing components from the PulseUI framework and combine them in new ways. It was super easy, barely an inconvenience.
Why bring Pulse to watchOS in the first place? Many of the watchOS apps are designed to be used outdoors, during physical activities. You won’t be carrying a computer with you to a gym, will you?
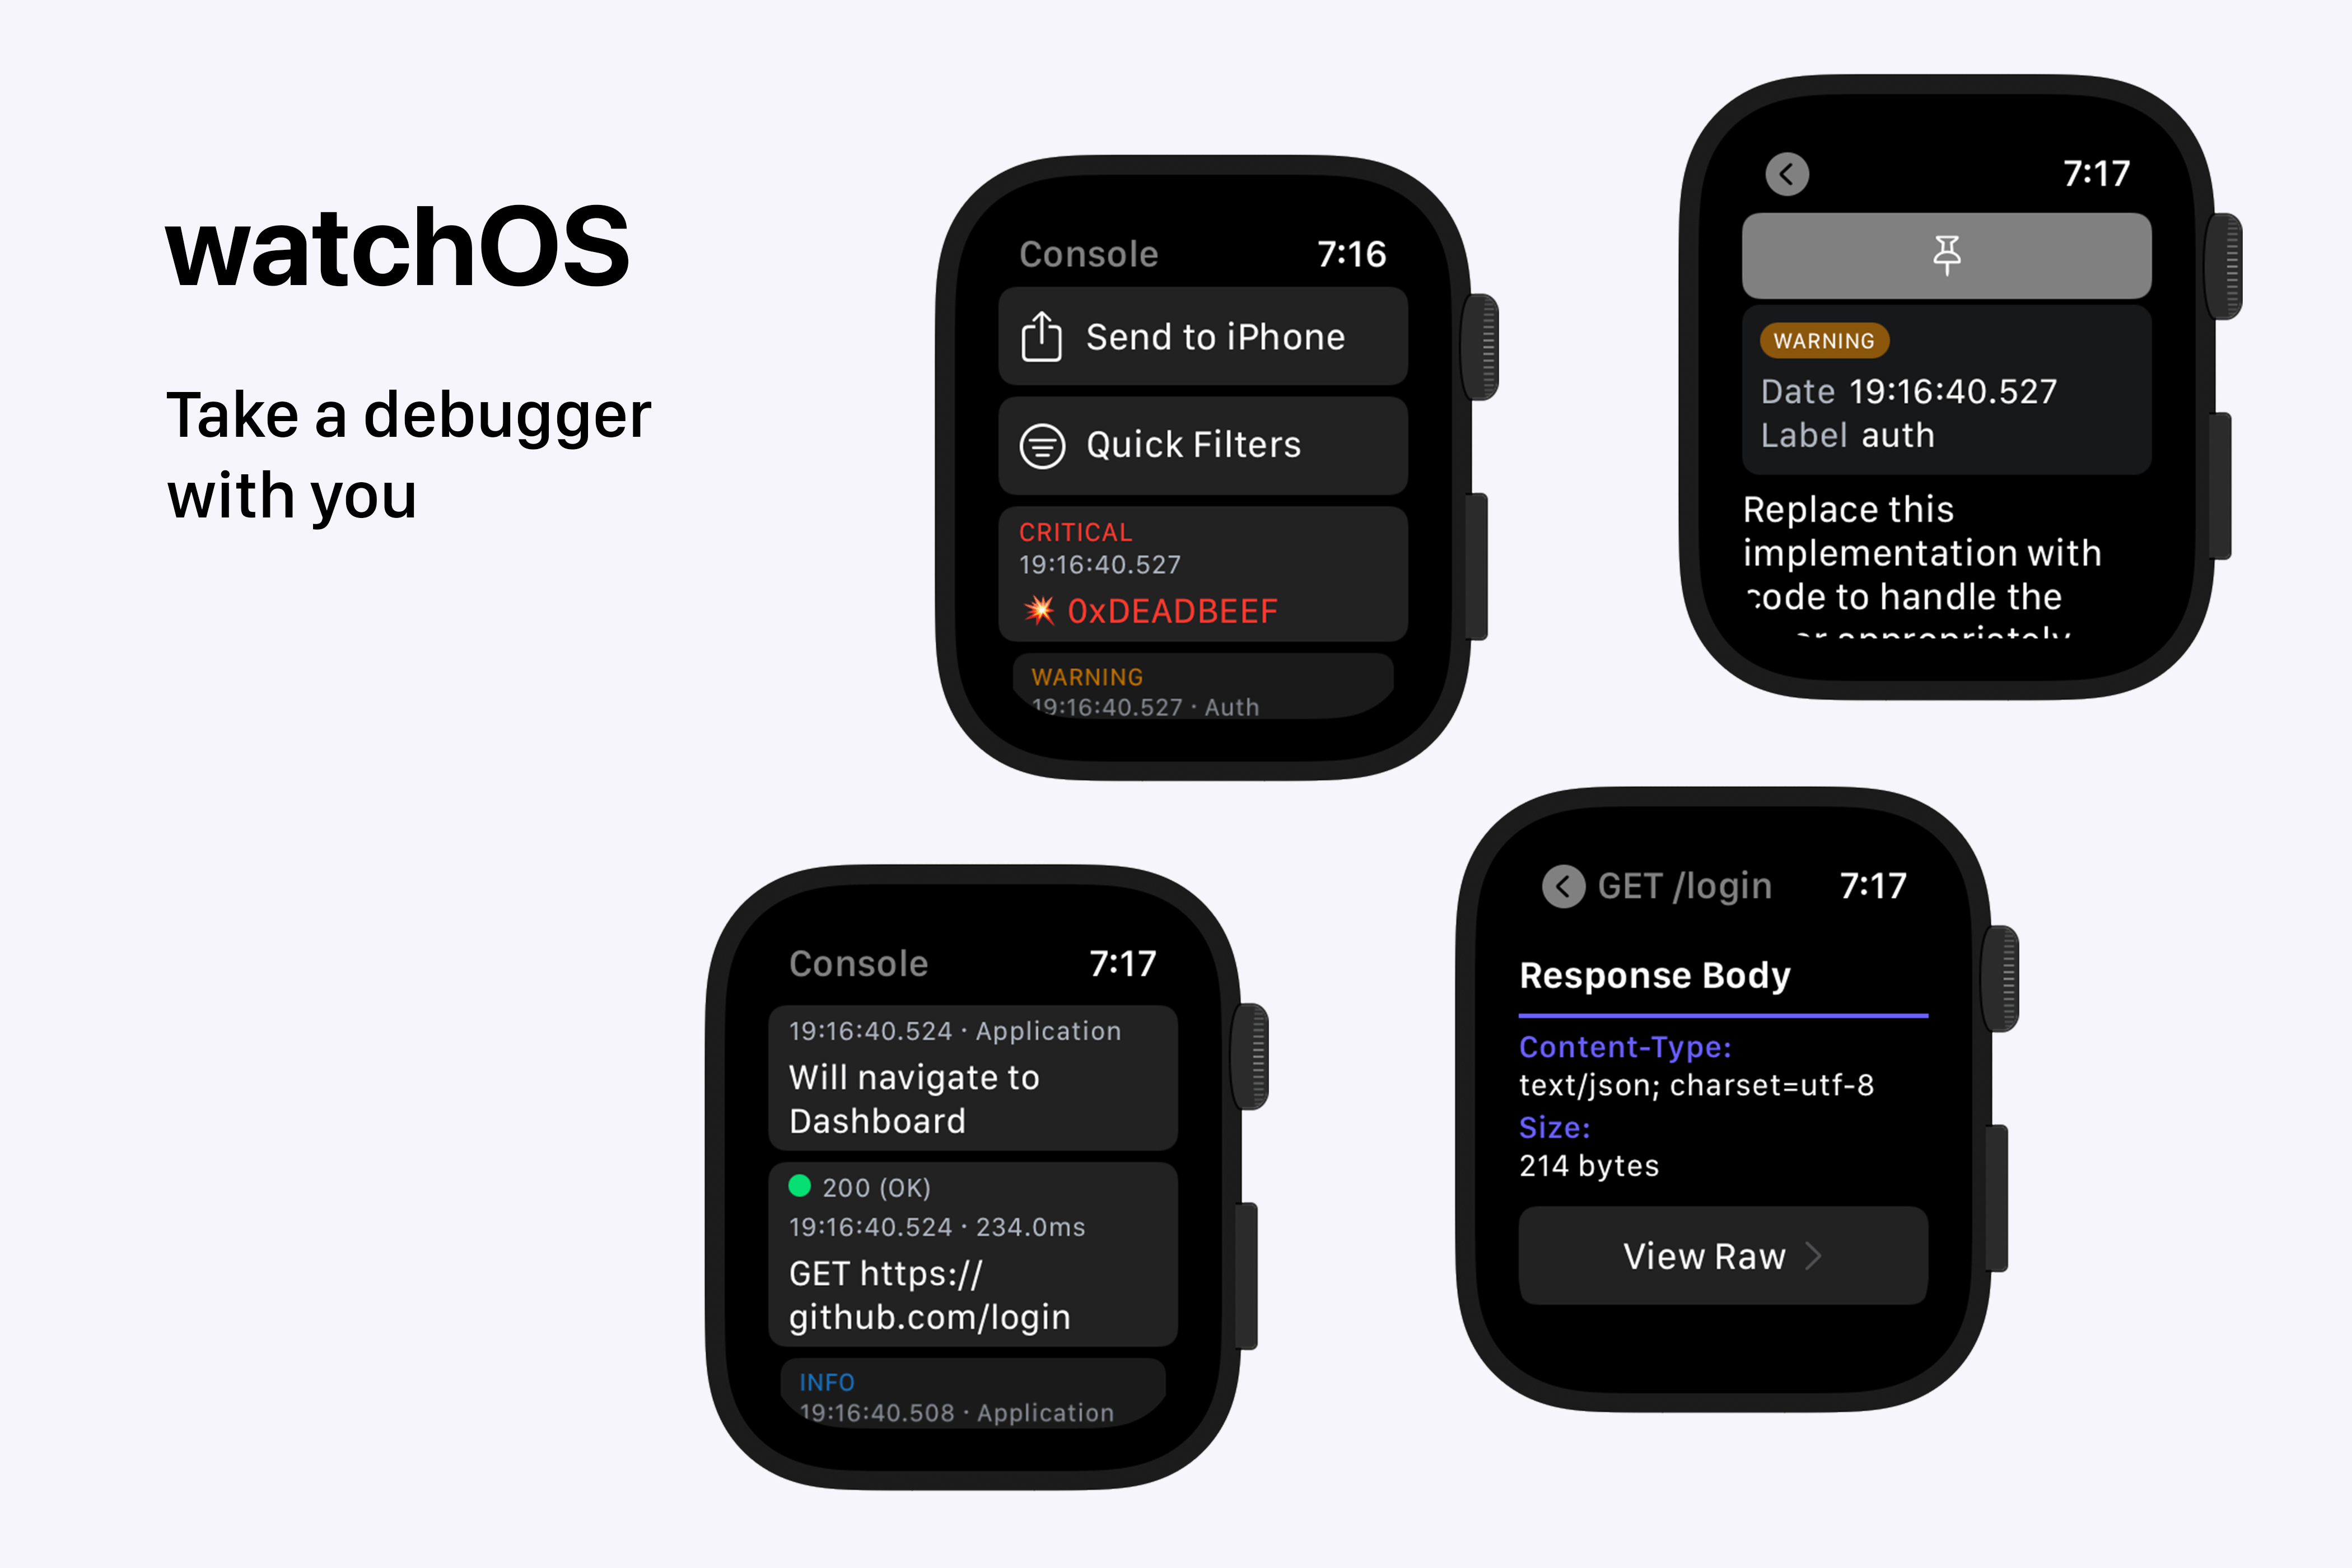
With Pulse, you can view network requests and logs right on your wrist. All logs are recorded persistently and can be shared at any time to other platforms, for example, iOS. Pulse for iOS offers a great experience and a feature-set on par with a macOS version.
Development #
The most challenging aspect wasn’t the implementation, but figuring out what features to build (and, more importantly, what not to). I didn’t have any idea what to do, but I knew I needed a list and a way to share messages. So I added that first.
List #
List is the bread and butter of SwiftUI, and is, of course, also available on watchOS. The list items came from iOS with slight adjustments to the layout. And to display a button that is initially hidden but appears when you scroll, I used the toolbar.
var view: some View {
    List {
        // ...
        ForEach(model.messages, id: \.objectID, content: makeListItem)
    }
    .toolbar {
        ButtonRemoveAll(action: model.buttonRemoveAllMessagesTapped)
            .disabled(model.messages.isEmpty)
    }
}

private func makeListItem(message: LoggerMessageViewModel) -> some View {
    NavigationLink(destination: ConsoleMessageDetailsView(message)) {
        ConsoleMessageListItemView(message)
    }
}
The screen structure was different on watchOS. I decided to reimplement it from scratch on watchOS, but reuse the ViewModels and most of the “leaf” views from other platforms. For example, ButtonRemoveAll comes straight from iOS with no modification. It automatically displays a confirmation alert and everything.
Share #
There are not a lot of options to share stuff from the Apple Watch. I ended up using WatchConnectivity framework for transferring files to a companion iOS app (in case there is one). To communicate the status of the transfer, I display it right in the button.
var view: some View {
    List {
        Button(action: model.tranferStore) {
            Label(model.fileTransferStatus.title, systemImage: "square.and.arrow.up")
        }.disabled(model.fileTransferStatus.isButtonDisabled)
        // ...
    }
    .alert(item: $model.fileTransferError) { error in
        Alert(title: Text("Transfer Failed"),
              message: Text(error.message),
              dismissButton: .cancel(Text("Ok")))
    }
}
I know this isn’t ideal. When I add remote debugging capability, I’ll consider adding an option to transfer logs continuously to a companion app. What do you do for standalone apps? Not sure yet, but, hopefully, there are options.
Quick Filters #
I knew I couldn’t bring a full-fledged search and filters from other platforms, but I needed to add something. A solution – present a small list of pre-defined quick filters. It’s convenient when you just want to see errors, or, let’s say, only network requests.
var body: some View {
    List {
        // ...
        Button(action: { isShowingFiltersView = true }) {
            Label("Quick Filters", systemImage: "line.horizontal.3.decrease.circle")
        }
        // ...
    }
    .sheet(isPresented: $isShowingFiltersView) {
        List(model.quickFilters) { filter in
            Button(action: {
                filter.action()
                isShowingFiltersView = false // Dismiss when an option is selected
            }) {
                Label(filter.title, systemImage: filter.imageName)
            }
        }
    }
}
Details #
When you open the details page, it’s just a NavigationLink. For this page, I reused the components from the other platforms and simply switched from vertical layout to horizontal for key-value view. It’s a bit of a shame that you need to change from one class HStack to another VStack instead of simply flipping an option like in UIKit.
Conclusion #
I’m glad I had my Apple Watch lying around. I was so excited deploying an app to it for the first time. It brought up the memories of doing the same on iOS many years ago!
On this positive note, I’m ready to wrap up my SwiftUI experiment tomorrow.