There is always this friction when debugging native apps. You can’t look behind the scenes, unlike browsers with their developer tools. The idea behind Pulse is to bring the same or better debugging experience to native apps.
With the Pulse framework, you can record logs and network requests, view them directly on your device, and share later. And with a new Pulse Pro app for macOS, you can inspect logs remotely in real-time.
The new app is designed to be flexible, expansive, and precise while using all the familiar macOS patterns. It makes it easy to navigate large log files with table and text modes, filters, scroller markers, an all-new network inspector, JSON filters, and more.
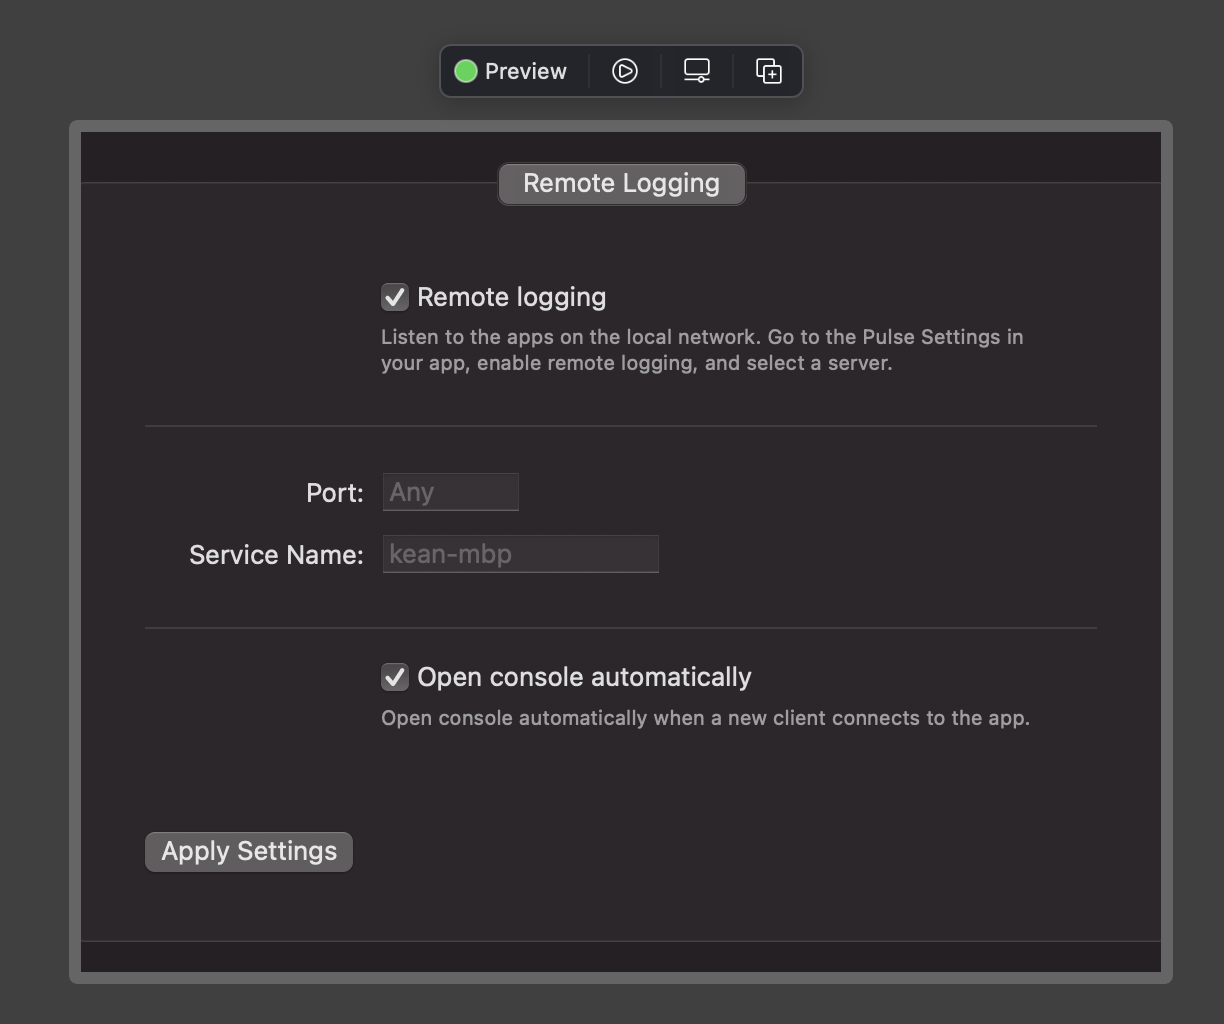
Remote Logging #
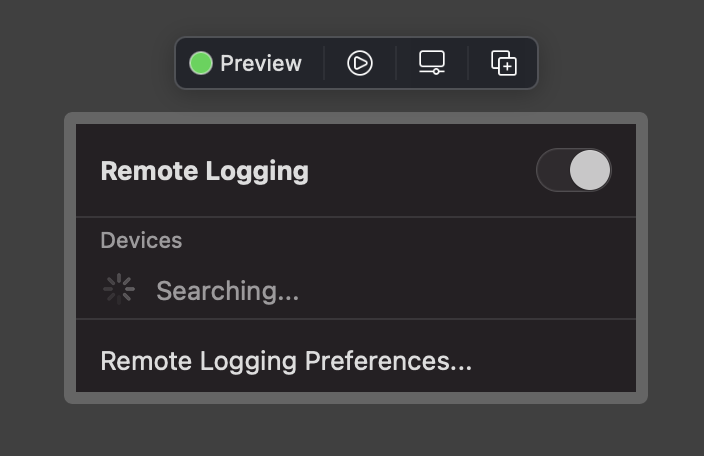
The headlining feature of Pulse Pro is Remote Logging which allows you to view logs and network requests in real-time on your Mac. It’s very easy to use, fast, and reliable. To starting using it, first launch the Pulse Pro app and enable Remote Logging.
When enabled, your Mac becomes discoverable on your local network. You only need to enable it once. Next time you launch Pulse Pro, it will happen automatically.
Then, enable Remote Logging on the device with the Pulse framework installed. When your Mac appears on the list, select it to pair the devices. This extra step is needed to ensure that in a space with multiple devices running Pulse Pro, you’ll have a way to choose which one to connect to. You only need to do the pairing once.
Pulse is written in SwiftUI and is available on all Apple platforms. The same is true with remote logging. It works on iOS, watchOS, tvOS, and macOS if you need to. And it even works in simulators.
As soon as the devices are paired, there is zero additional interaction needed. When the device connects to the Pulse Pro app, the console opens automatically. You can turn this option off later in settings. And the device remembers which Mac it is paired with, so the next time it’s launched, it will connect right away without your interaction.
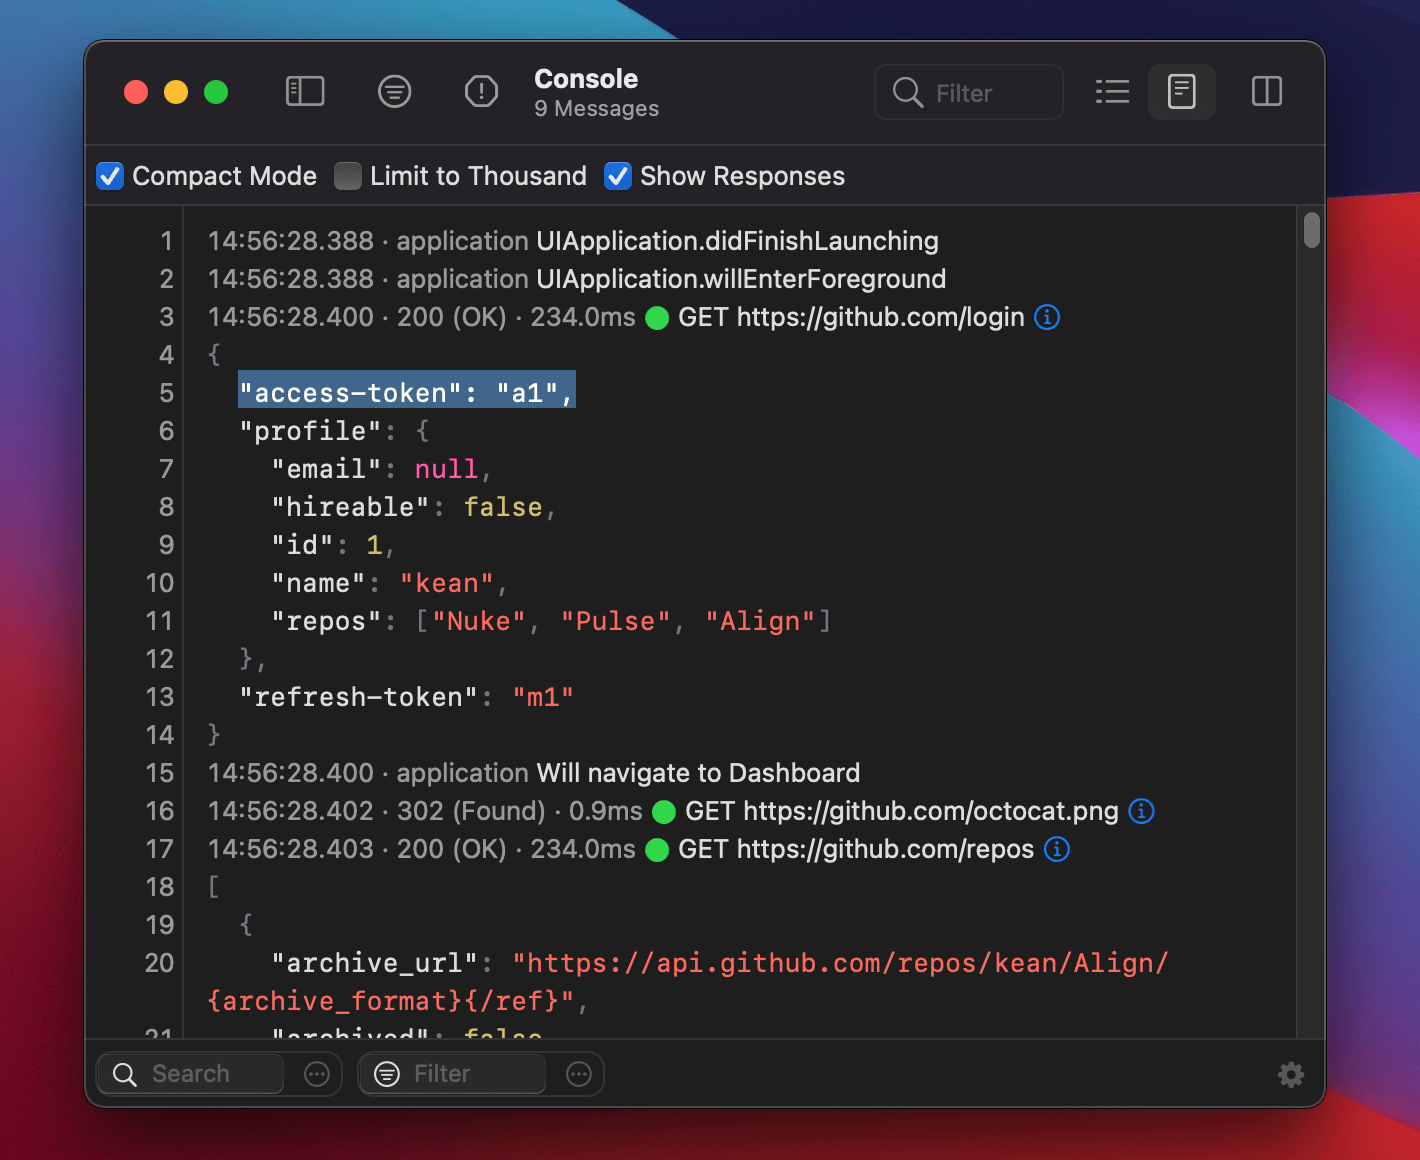
The logs are stored persistently both on the device with the Pulse framework and by the Pulse Pro app, so you can get back to them later. You can also easily delete them if needed.
Remote Logging is implemented using the new Apple Network framework. It advertises the Bonjour service on the local network and listens to the TCP connections. The client app replicates all the logs to the server using a simple custom binary protocol. It even sends the logs recorded during the app launch while the connection isn’t up yet.
Table Mode #
The previous version of the Pulse macOS app was fairly limited. It had an inflexible interface with many iOS-isms. There was only one mode to display information – a list view. You couldn’t toggle between vertical and horizontal layouts. Most of the text in the app was non-selectable. Overall, it just wasn’t taking full advantage of the platform. It was a nice native macOS app, but you couldn’t call it a professional app by any stretch of the imagination.
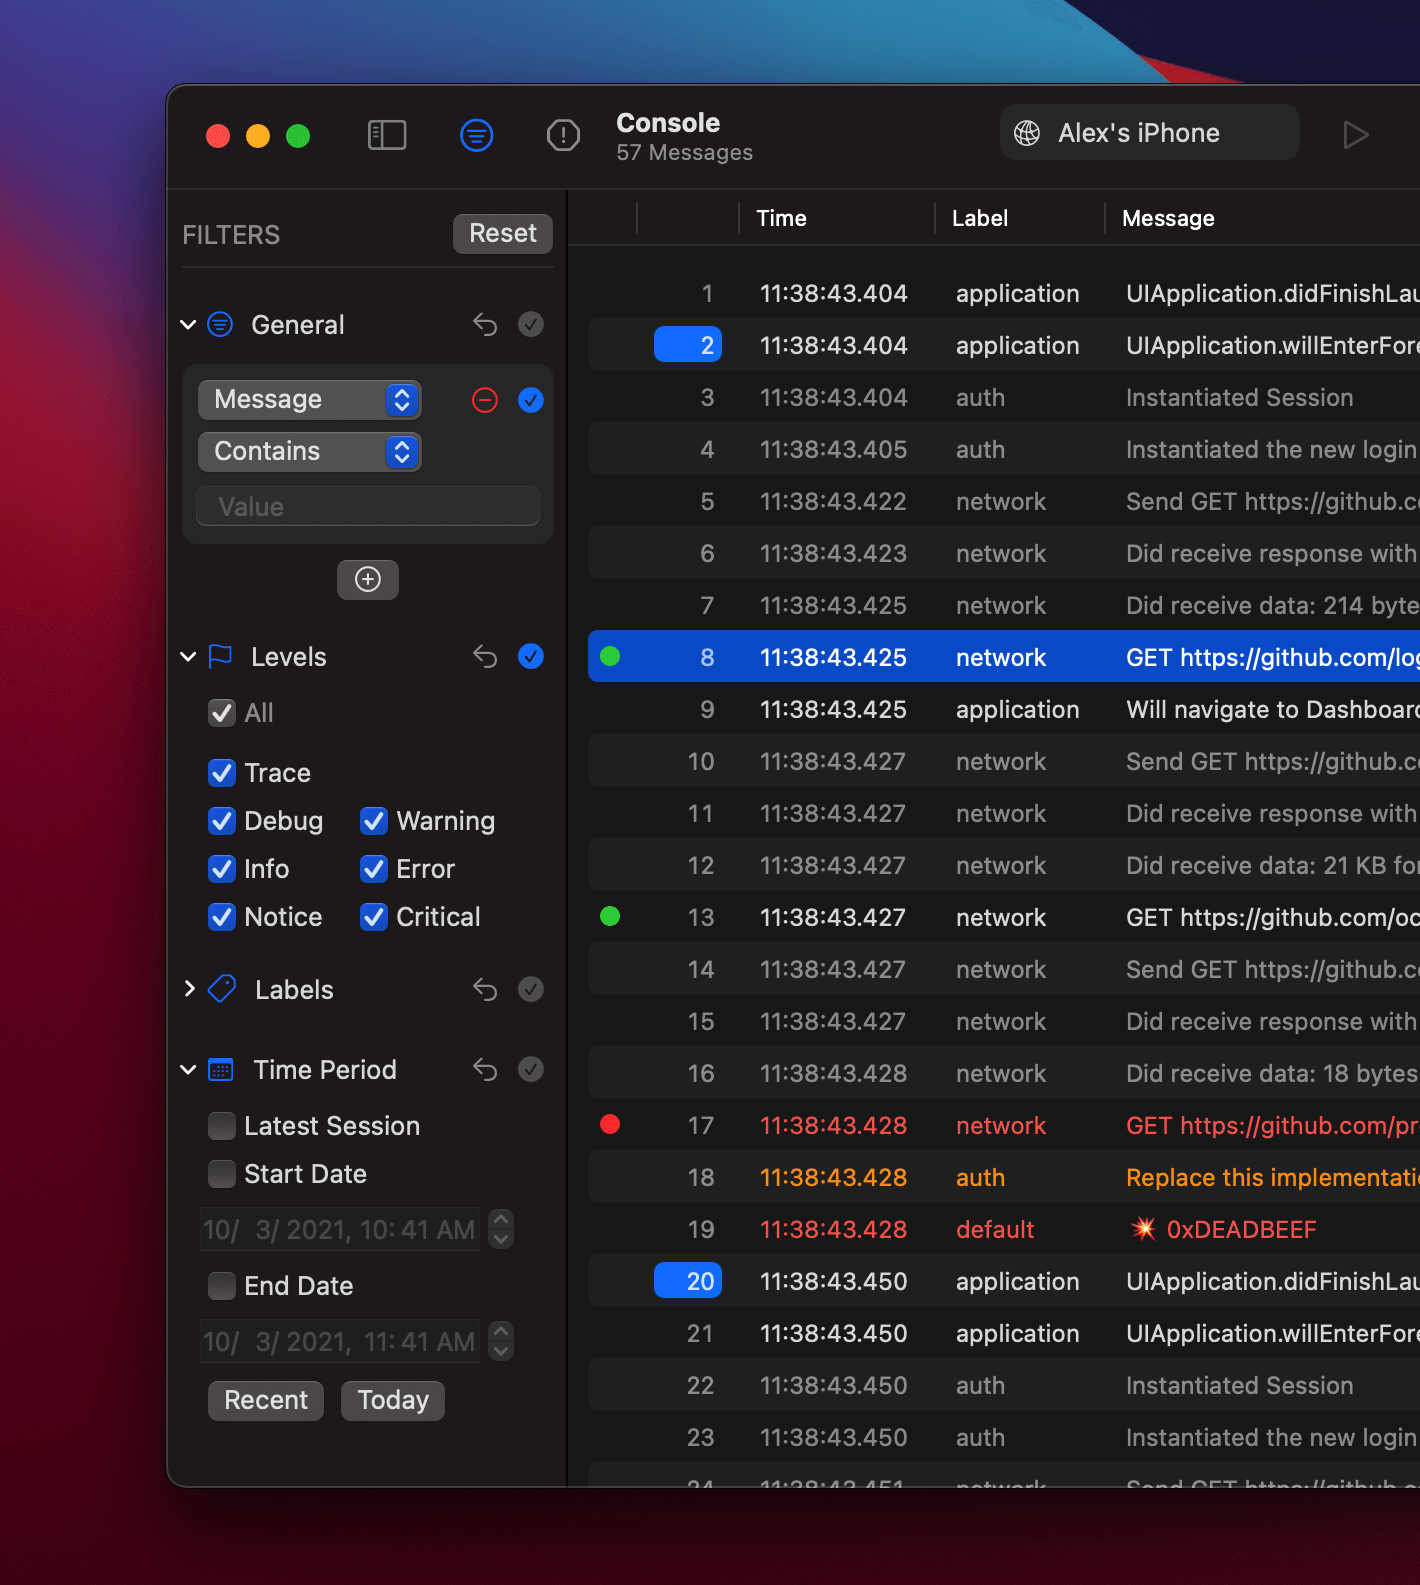
Mac apps are flexible and adjust to how we individually use them. The first change that I made for Pulse Pro was to replace the list view with a fully adjustable table1.
When you launch the console for the first time, you are greeted with a simple and clean view with only a few columns and no details panel. You can remove and hide columns, and the app remembers your choice. And, of course, you can sort by a column. The high information density and flexibility allow you to really interact with your data.
Using NSTableView felt surprisingly refreshing. I appreciate how well the delegate-based API design scales with complexity. UIs are inherently hacky, and with delegates (and classes) in AppKit, you can customize every bit of it and also make sure you refresh data efficiently to support big data sets.
When you click to select a row, the details panel is open. You can select between vertical and horizontal layouts, and your choice is saved. If you double-click, the details are opened in a separate window instead.
OK, at this point, you might think these are the table stakes for a macOS app. And you’ll be right. But it was important for me to get these right. I’m primarily an iOS engineer, and I’m breaking new ground here. And bare with me, there is more coming.
Filters #
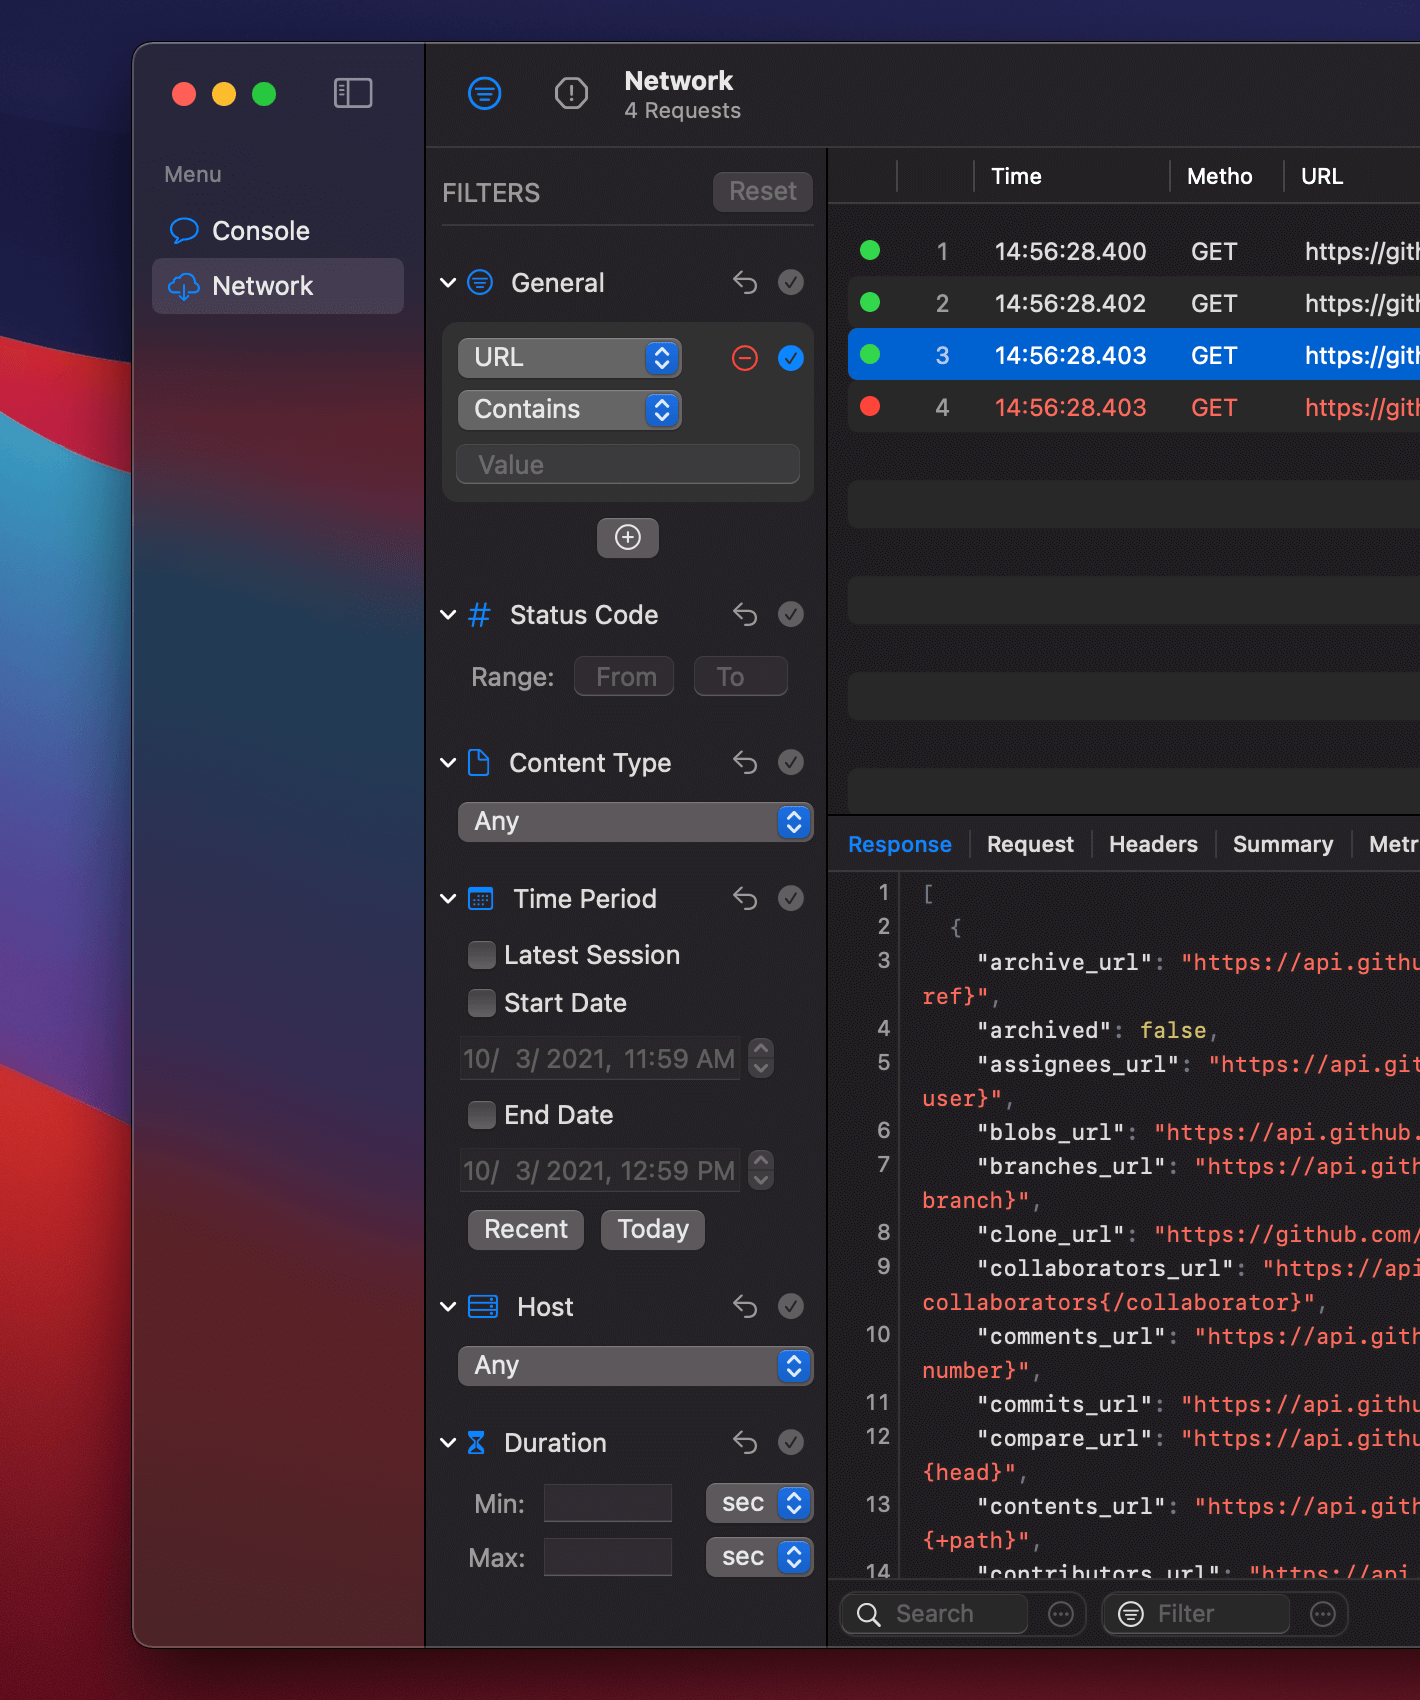
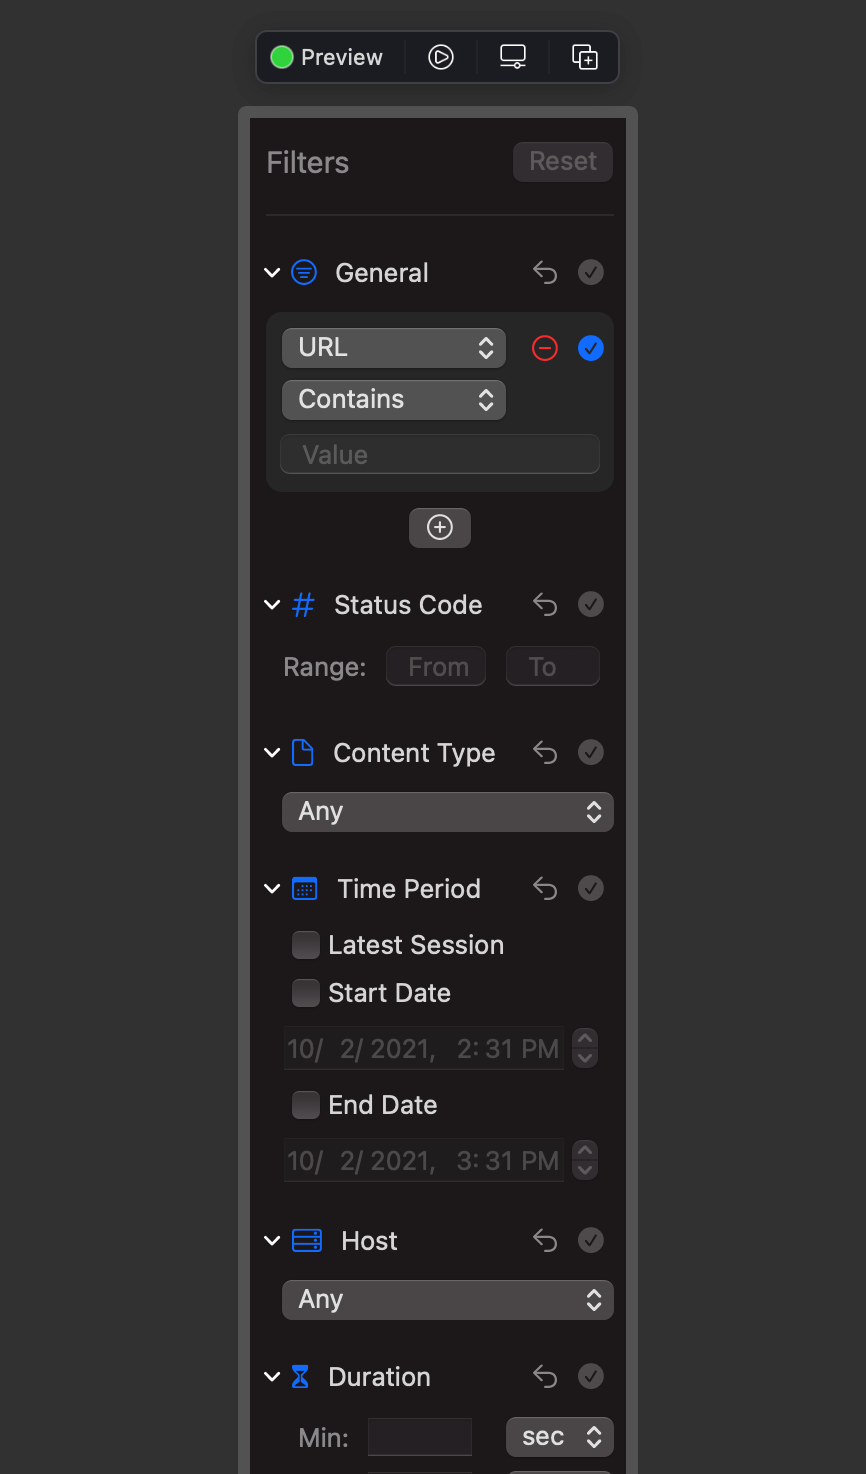
Filters were also fully redesigned. You know how in many apps you configure the filters, but then your only options are to either reset them all or change them back to the defaults manually. In Pulse Pro, you can toggle and reset each filter individually, which is surprisingly convenient. You can collapse the sections you rarely use, and the app saves your preferences. To show filters, hit Cmd+Option+F or click the toolbar item.
Text Mode #
Tables are perfect for many use cases, but sometimes nothing beats good old text. But plain text logs have their own problems. As soon as you go plain text, you lose all of the structure. Text usually has no formatting, you can’t open details for the message, and you can’t filter text dynamically like you can a table view. But what if you could?
Toggle the “List” mode, and Pulse Pro will generate the formatted text based on your current filters. Change the filters, and it re-generates the text. I’ve done a ton of optimizations to make it as quick as possible. For example, I cache the strings generated for the individual messages and simply re-compose them later.
The text view itself is also pretty powerful. You can search, filter by line, show line numbers, and change some basic settings like font size. I’m also going the same minimap as in the console soon – more on it later.
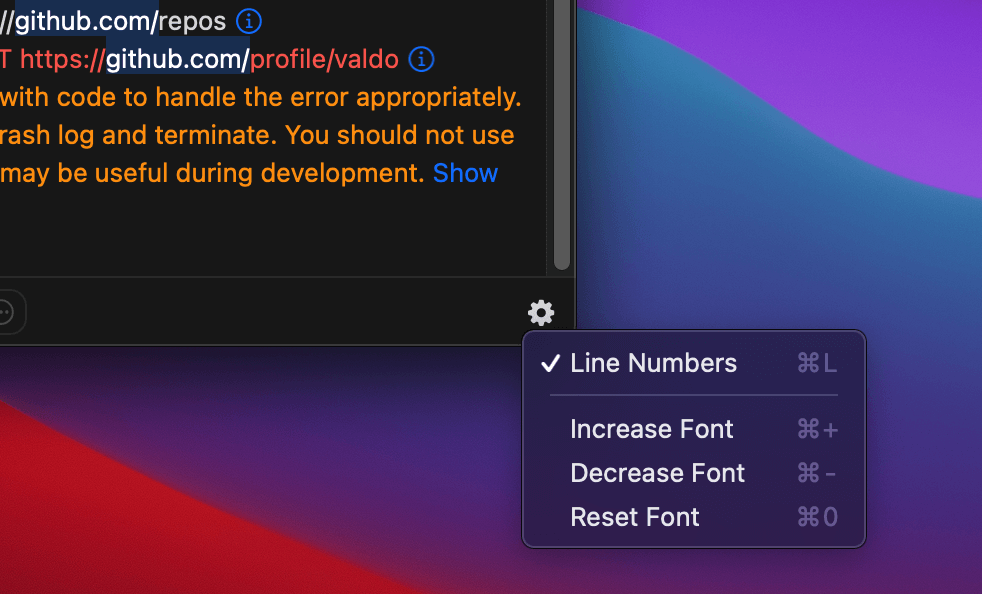
You can also toggle “Show Responses” to see nicely formatted network responses inline with your logs. Unlike the traditional plain text logging system, you can make this choice on the display time instead of the time of logging, which is great.
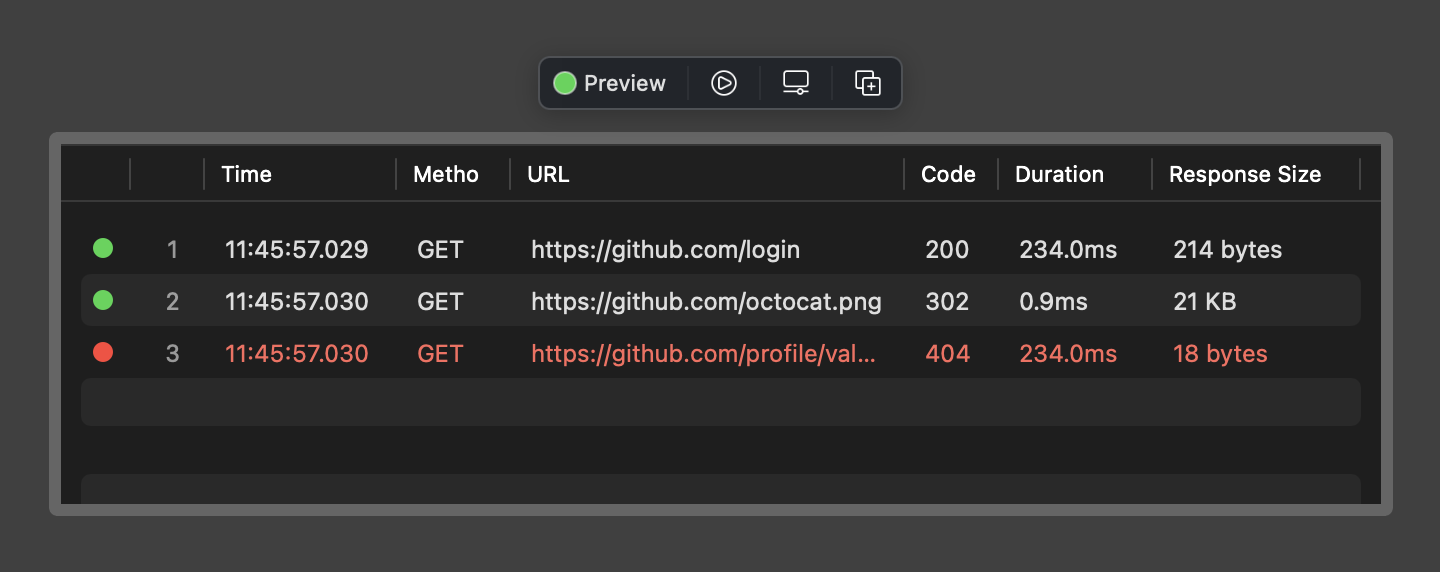
Network Tab #
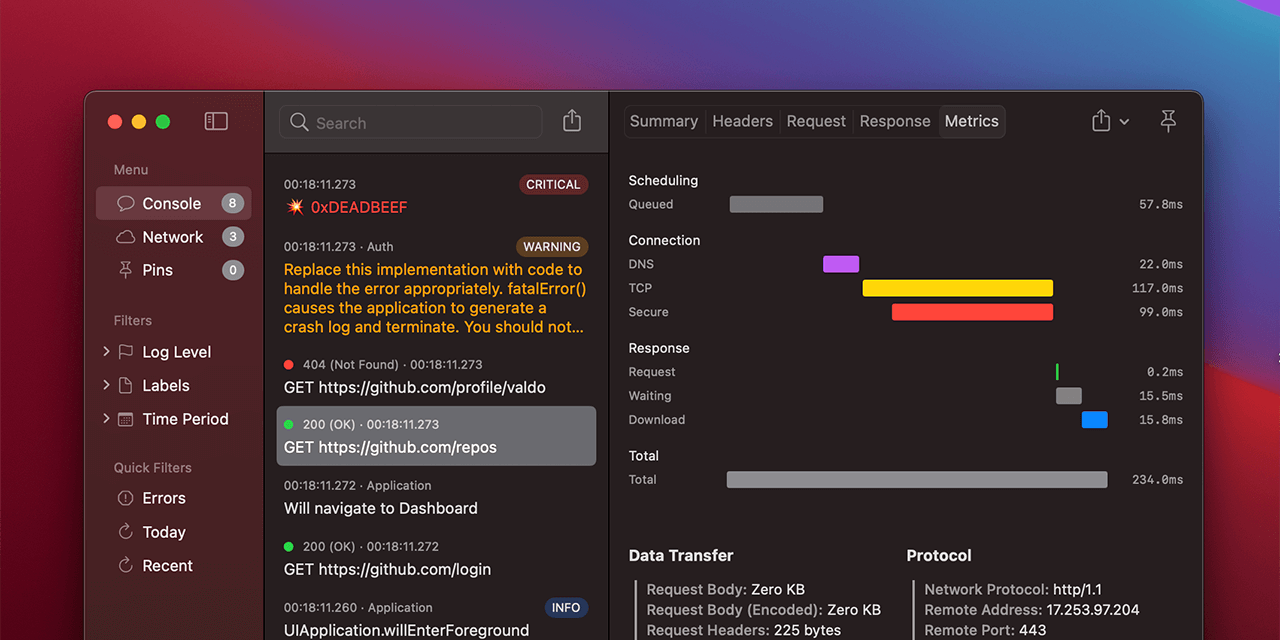
Now let’s talk a bit about networking. The previous app also had a separate “Network” tab, but in reality, it was just the same interface reused interface from the “Console” tab with a filter applied. With Pulse Pro, network tab was completely redesigned. It now has its own view designed from scratch with its own columns and its own filters.
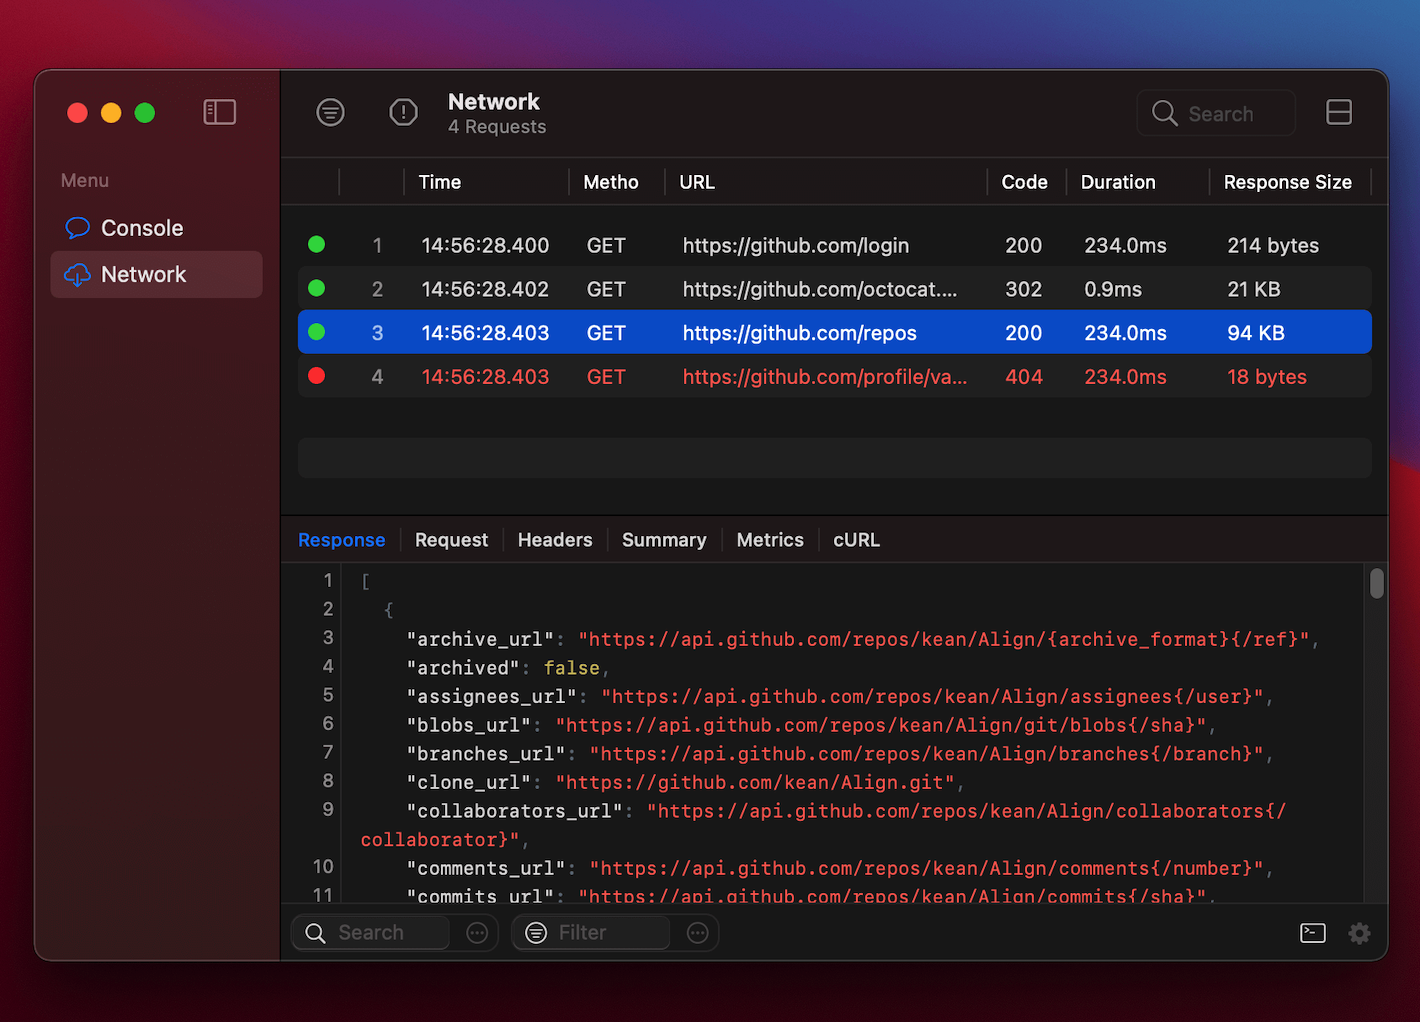
Networks filters were also designed from scratch. The most powerful filter is probably “General” where you can add as many custom filters as you’d like with an easy-to-use interface. You can filter by URL, host, method, request or response body or headers, and more.
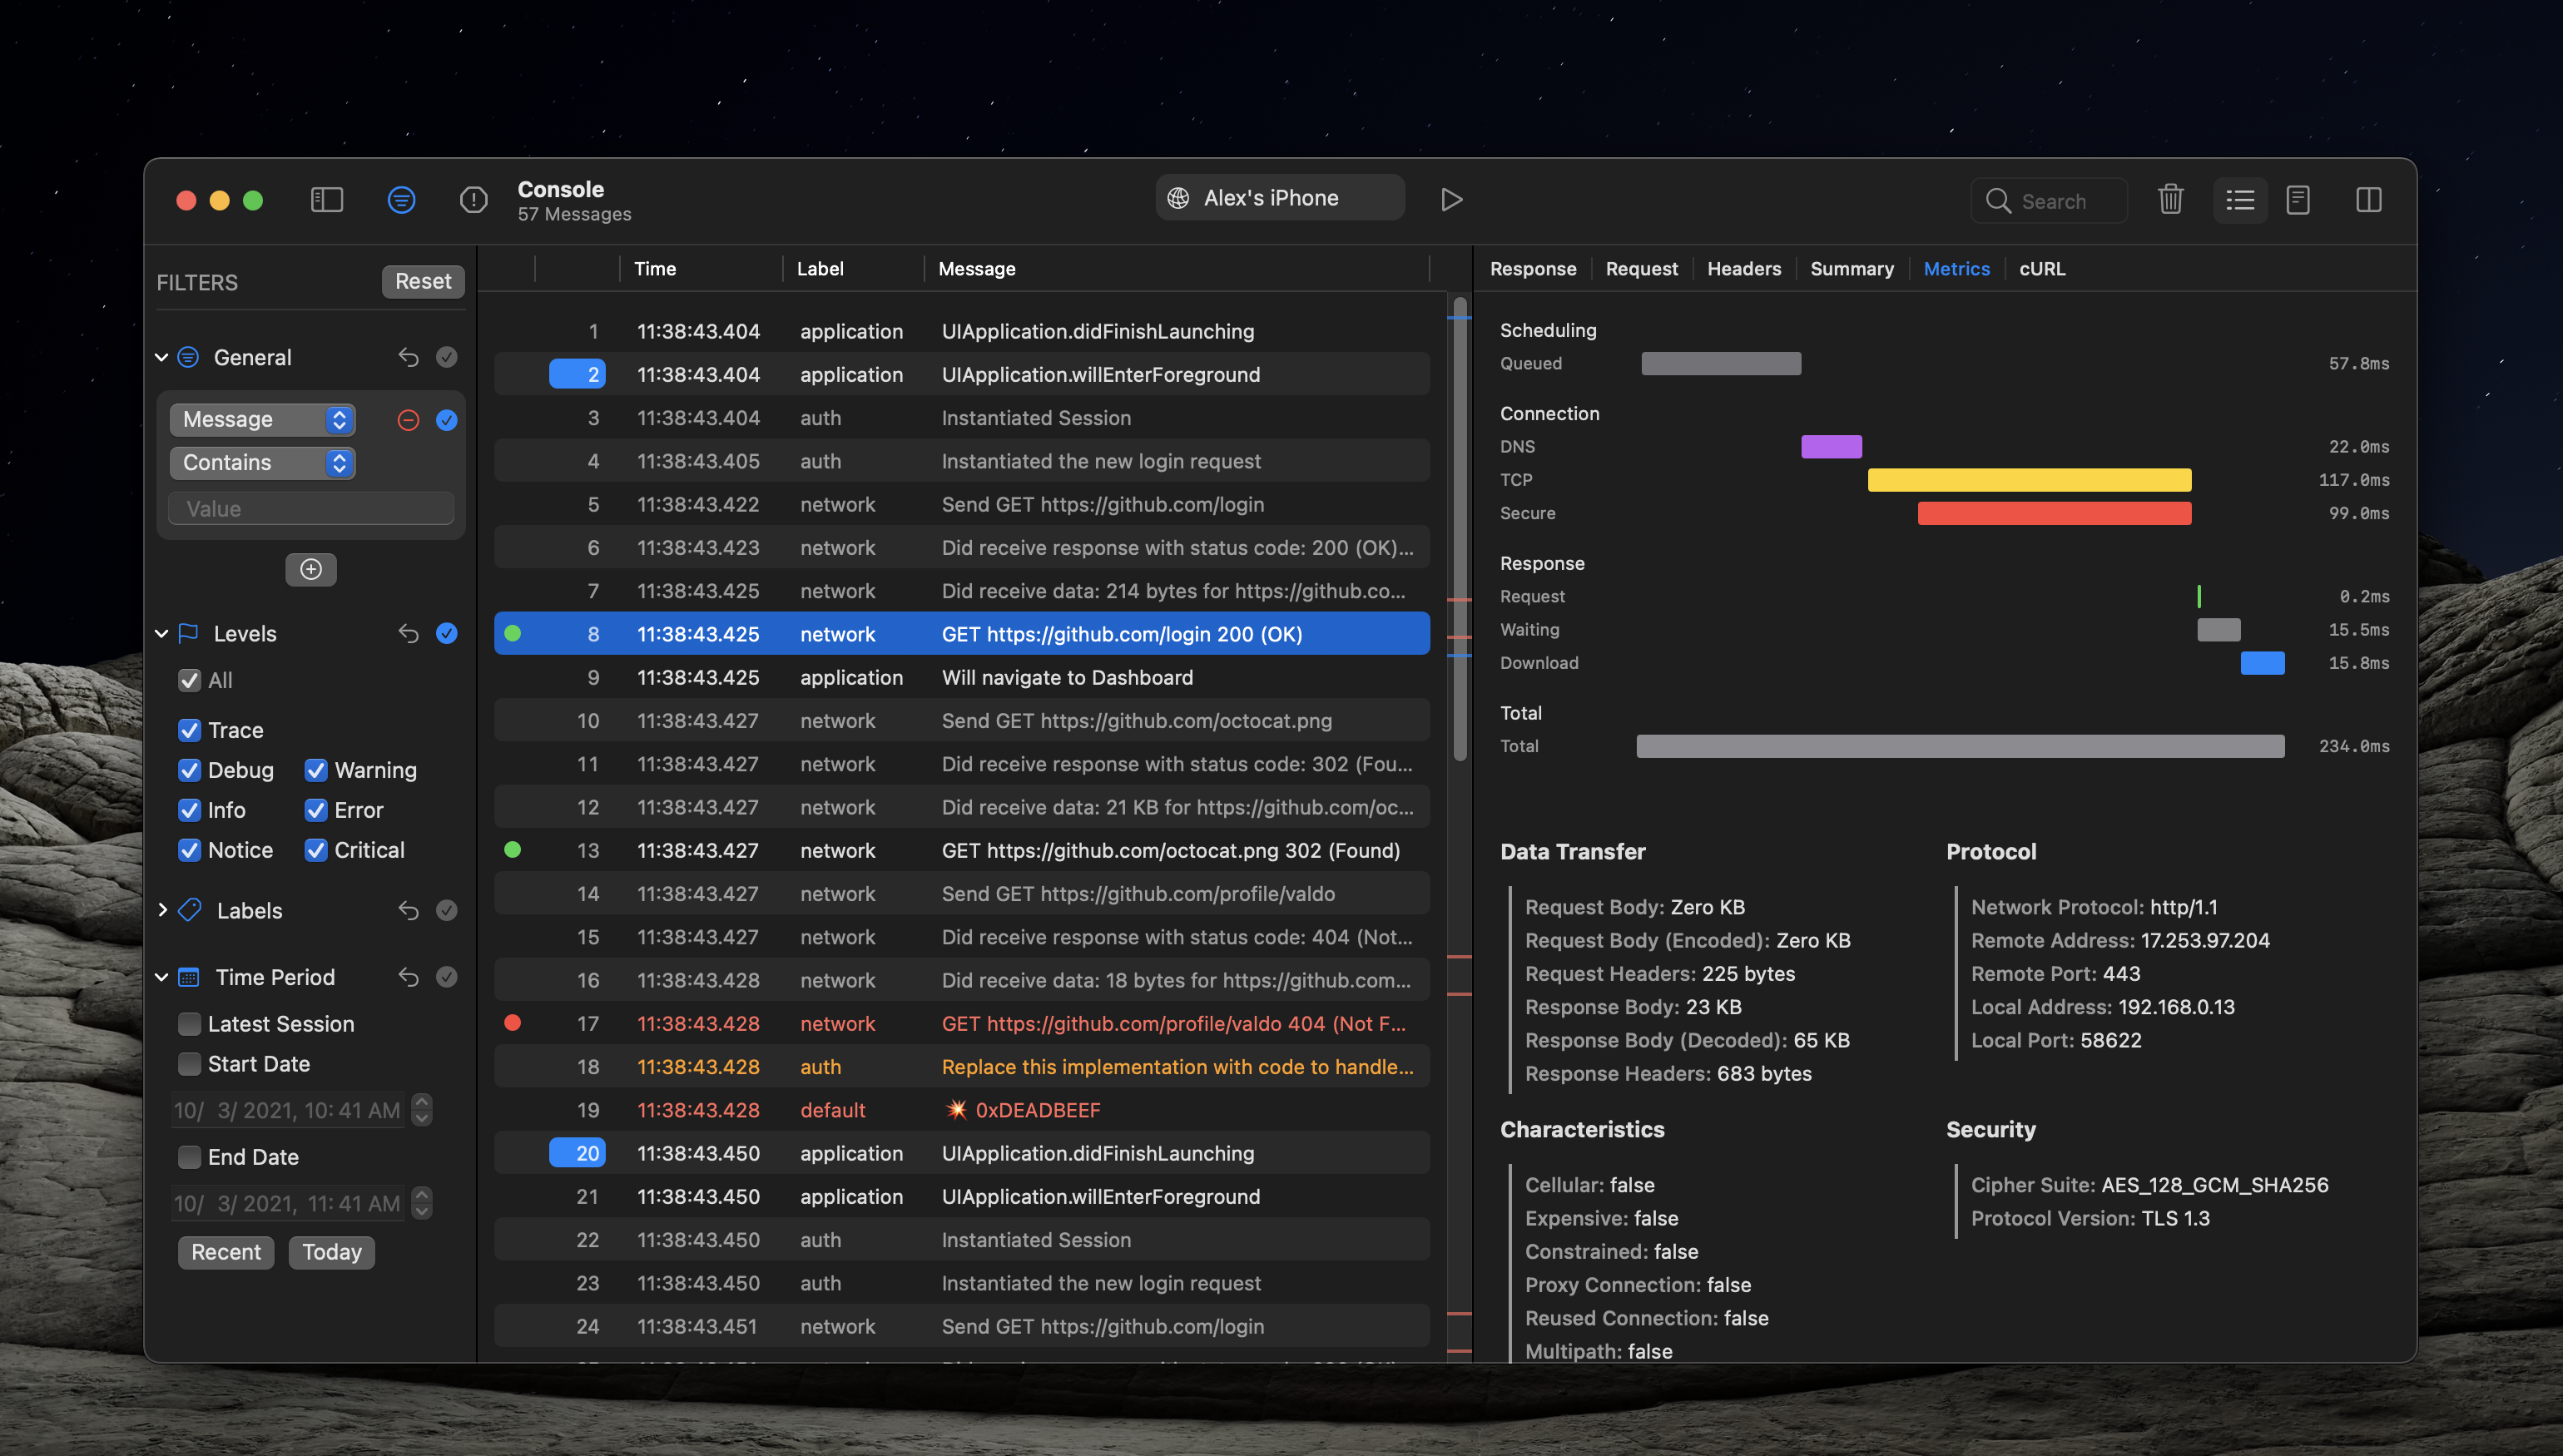
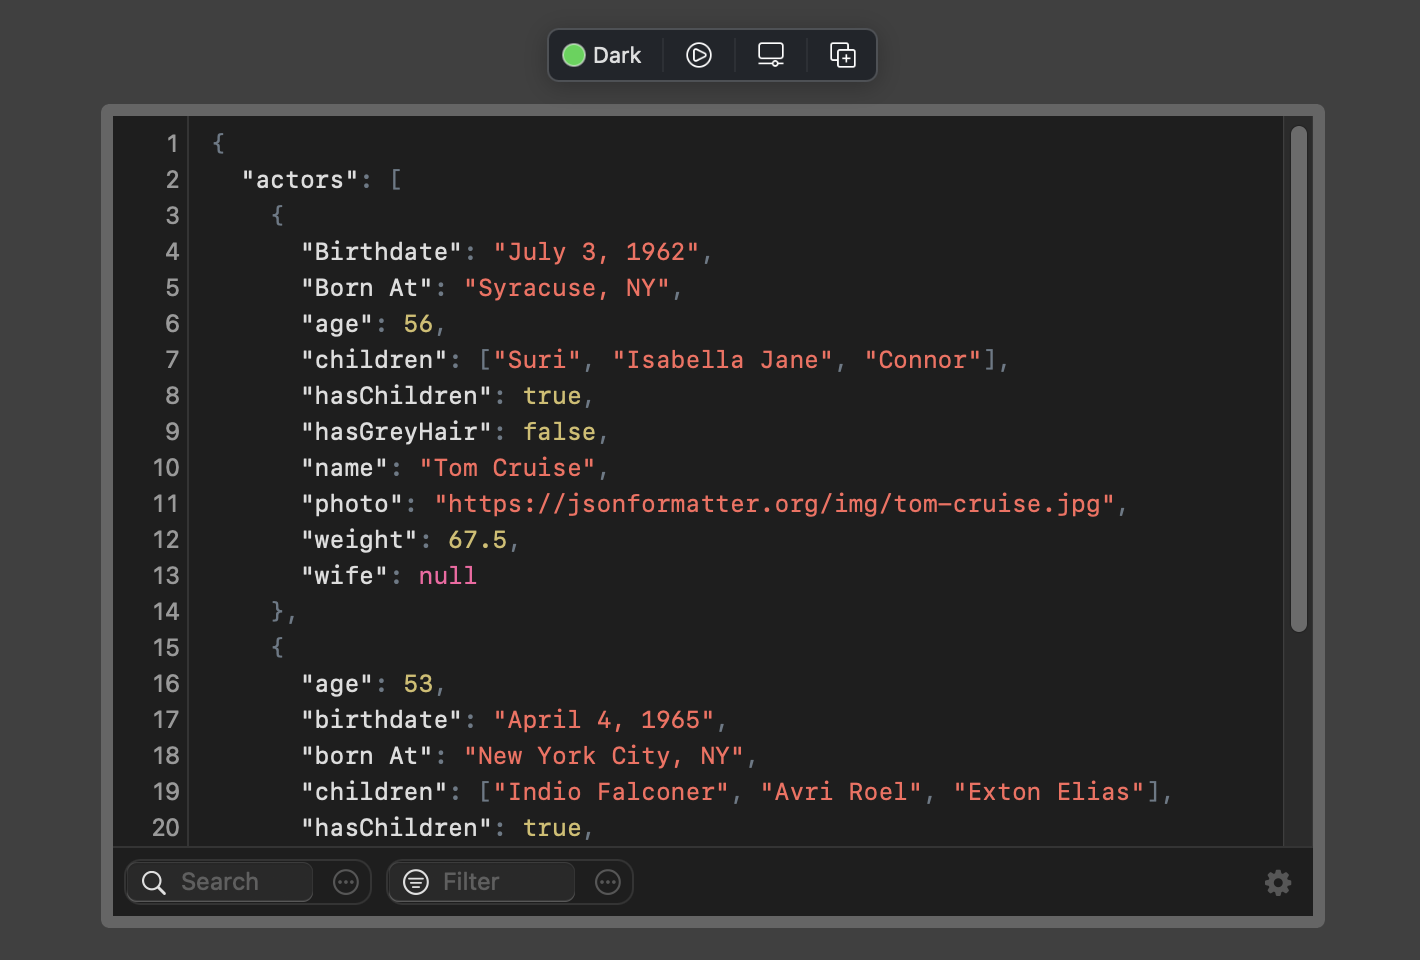
Response Viewer #
Response viewer has also gotten some love in this release. I added line numbers, the way to change some basic settings, like font size. There is a new color theme that matches Xcode. And, one of the features I’m super excited about, is a jq integration.
jq is a tool for processing JSON, applying the given filter. You can find some examples of what it can do at the jq website. It’s really-really powerful and Pulse Pro makes it super nice to use with side-by-side live results view, and nice output formatting.
Pins #
When you scan through the logs, you sometimes find important messages you may want to get back to later. With pins, you can easily do that. Just click on the row number that you’d like to pin, and it will appear in the scroller. You can easily navigate back to this message by simply clicking on the mark in the scroller – just like breakpoints and errors in the Xcode scroller.
In the point release, I’m also adding error marks to the scroller to make it easier to find them. After you use it, you’ll start wondering how you ever read the logs without it.
SwiftUI and AppKit #
I wrote the previous version of the app primarily using SwiftUI. You are probably wondering whether that’s the case with Pulse Pro.
The app is a hybrid of SwiftUI and AppKit, but I think it’s fair to say that most of it is still done in SwiftUI. Let’s go through some examples.
The all-new filters panel doesn’t have any AppKit code:
The preferences window and the new status bar menu2 I written entirely in SwiftUI. The preferences appear differently in the Canvas than in the app because you can’t use Settings in the previews.
I wrote table views using AppKit. I could probably build them using SwiftUI’s new Table API, but it’s available only in Monterey. By briefly going through it, I’m not sure it supports user-configurable columns, and there are probably more limitations. Fortunately, there is no pressure to write your views using only SwiftUI, and NSTableView is very easy to use.
The text views are also built AppKit (NSTextView and NSAttributedString). But the toolbar at the bottom is built using SwiftUI.
I’m pretty sure I can also replace it with SwiftUI in the future by adopting AttributedString – also Monterey-only. I’m not sure about the line numbers. I used NSRulerView to implement it, so the lack of it in Text might end up being a deal-breaker. But, again, I don’t see any problem with using AppKit for it.
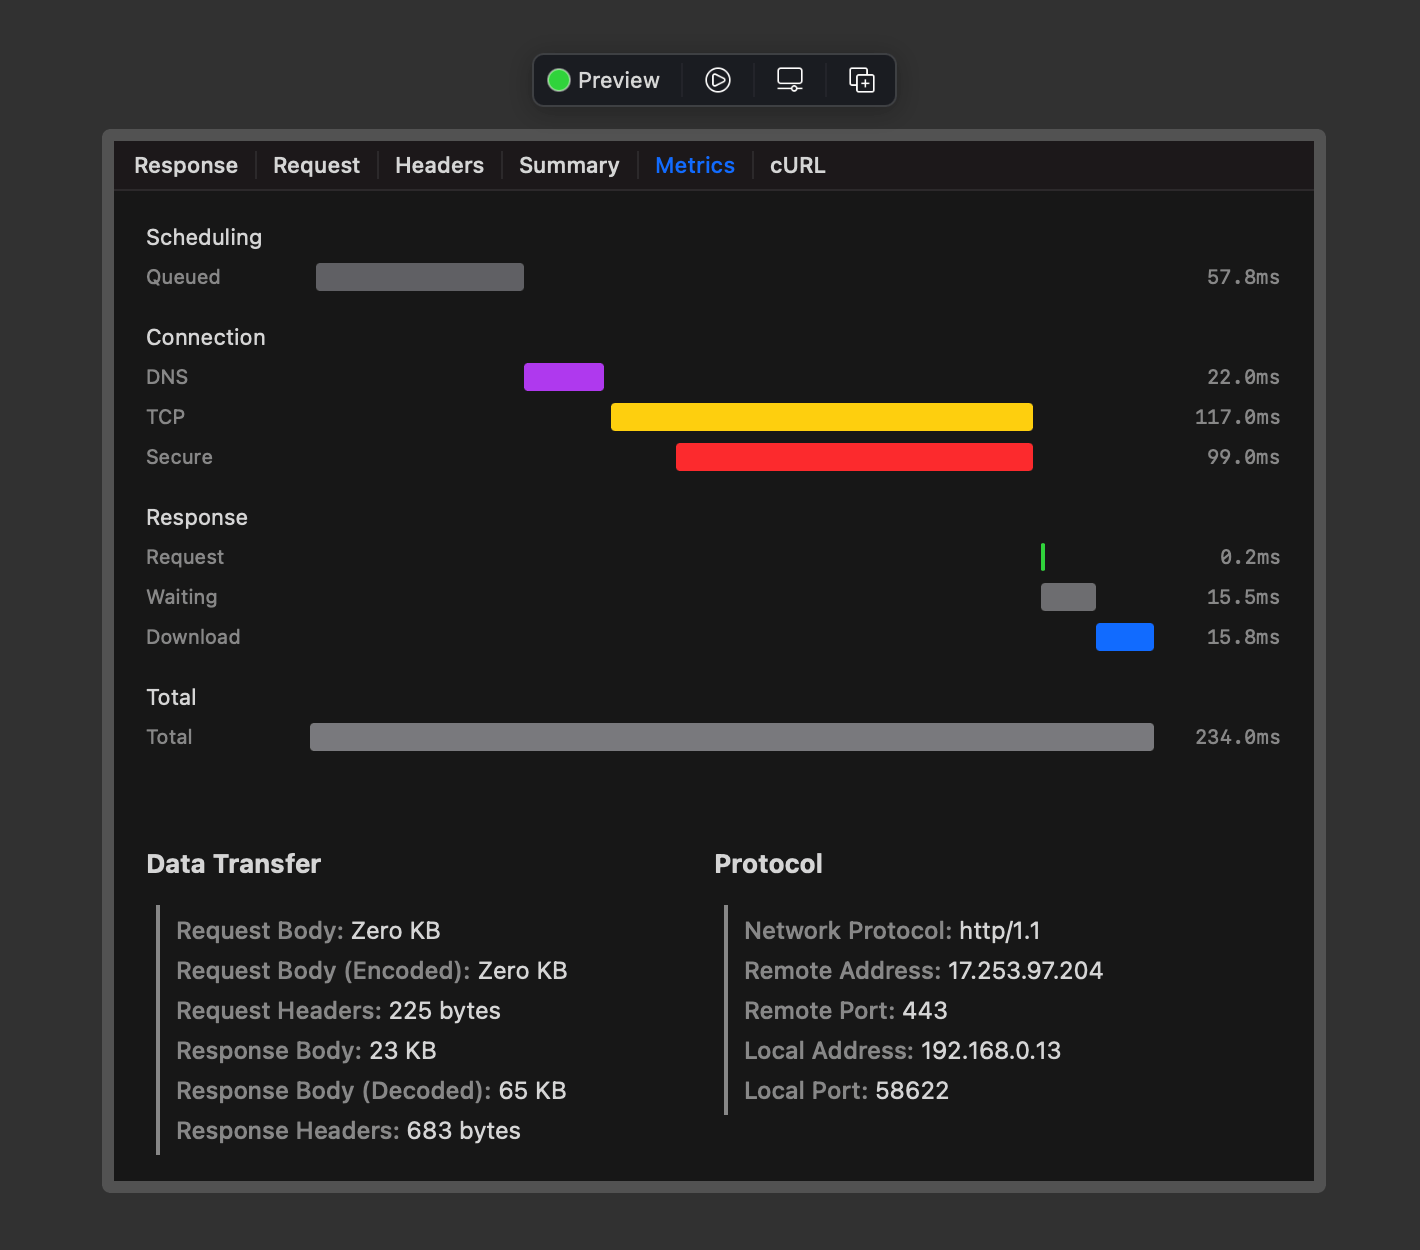
The Metrics view was largely unchanged in Pulse Pro and it’s still written with SwiftUI. The only change I made was to replace the “key-value” views with NSTextView to make the text selectable. In hindsight, I could probably use the new textSelection(_:) API, but too late for that.
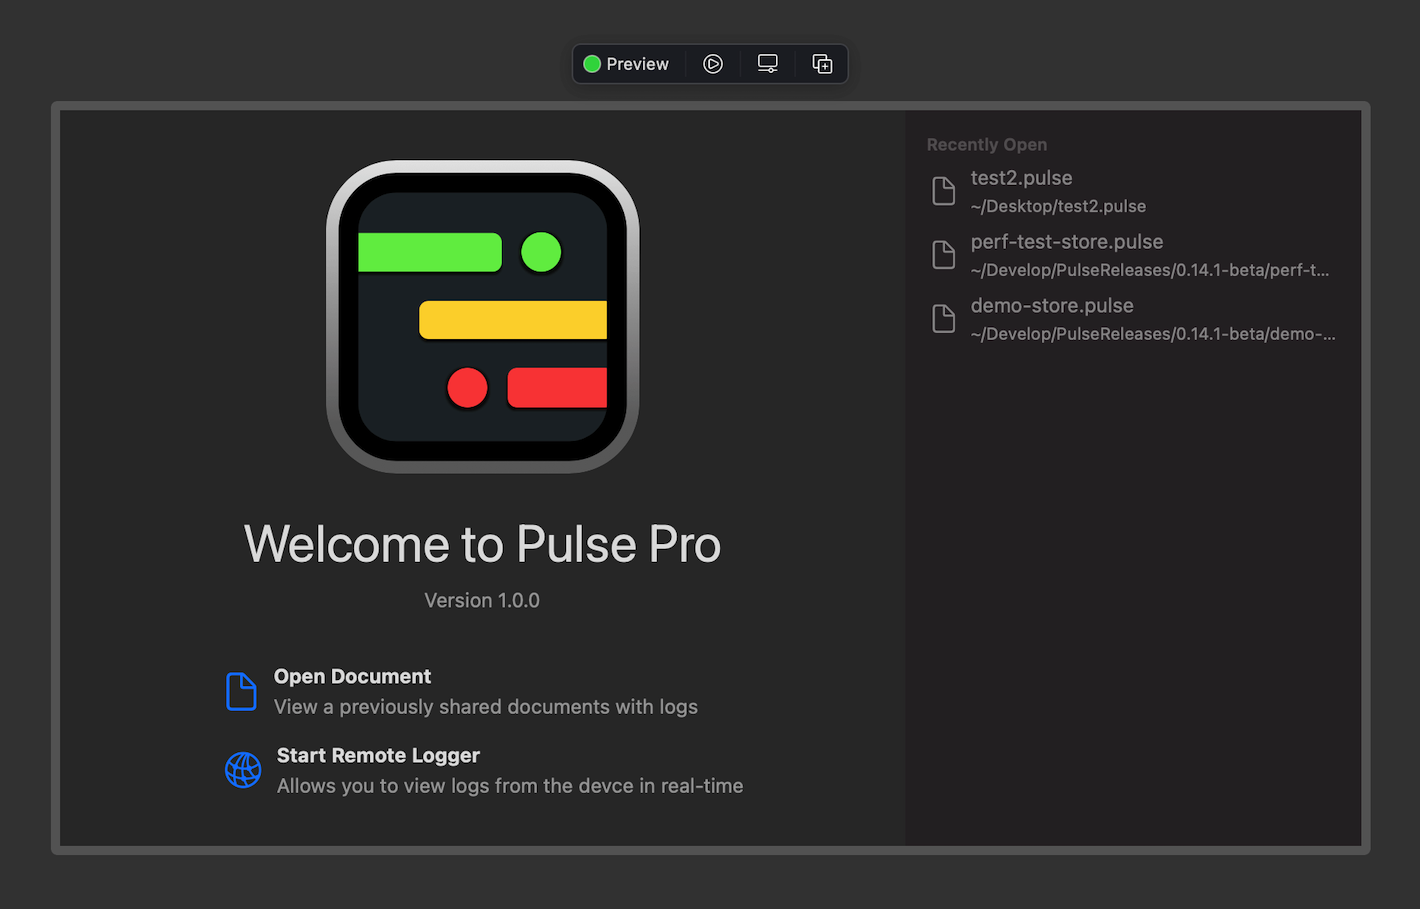
And the existing welcome screen is also implemented using only SwiftUI. I updated it a bit for the new version.
And it’s not just the individual screens or components. The entire app navigation is also done using SwiftUI. I’m using NavigationView, WindowGroup, Settings, handlesExternalEvents, Commands to manage windows, toolbars, and command menus. The window management API is fairly limited, so I have to access the underlying windows sometimes. I do that to close windows programmatically, listen to willCloseNotification events, making the existing window a key window, and more.
Even where I didn’t use SwiftUI I still used Xcode Canvas, and it significantly sped up the development. If I told you how quickly I wrote it, you probably won’t believe it. I wish it was a bit more stable though.
Final Thoughts #
Pulse is open-source and is available on GitHub as usual. You can integrate it into your app now and view logs using the on-device console. The latest version also includes remote logging, but it requires the Pulse Pro app.
Pulse Pro is available today.
-
Technically, the previous version of the app was already using
NSTableViewunder the hood for performance reasons, but it was running in a limited mode with no header and only one column. ↩ -
I created a single menu item with a custom SwiftUI view wrapped into
NSHostingView. Initially, there was an issue where it would only receive user events when one of the app’s windows was key. But thanks to this answer, I got it working. ↩